Grab My Blinkie

I CT For


Showing posts with label PTU animated tutorials. Show all posts
Showing posts with label PTU animated tutorials. Show all posts
Wednesday, September 10, 2014
CT For Scrapping with lil Ole me
New PTU tut animated : Hocus Pocus
Written on Sept 10th, 2014
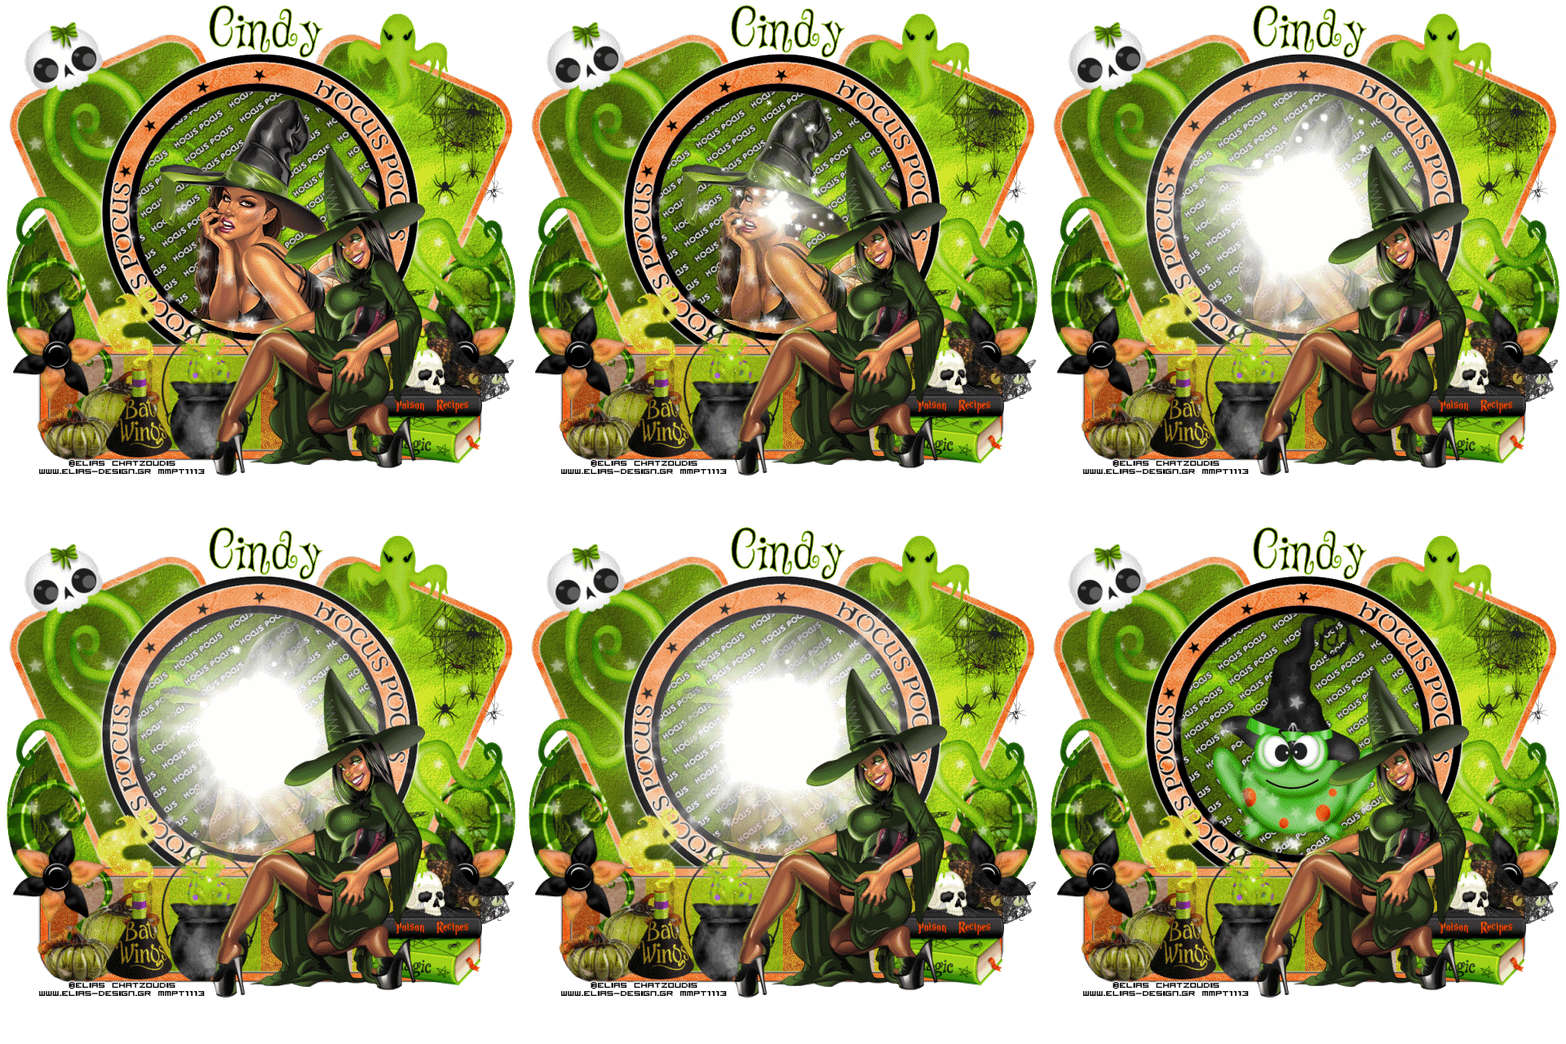
paint shop pro 9 or any version
animation shop 3
1 or 2 tubes of your choice I'm using the artwork of Elias Chatzoudis
you can purchase his tubes here Using a few older tubes but they are timeless i think :)
Sorcerers_spells scrapkit by Scrappin with lil ole me
you can purchase her scrapkits here
template 79 by Punky Butts HERE
animation by Missy:
Aura_ByMissy you can find this awesome animation here on her blog
its the one that says 5 new animations.
eye candy gradient glowfont of choice I used Wizards Magic
_______________________
OK lets get started
Open up the template delete the cr layer
and the top stars layers 18 and 19.
____________________________
layer 17 add paper 20 resize by 70%
delete original.
layer 16 add paper 25 resize by 70%
delete original layer.
layer 15 select all/float/defloat add a new layer and flood fill with
black. select none and delete original layer.
layer 14 (The word art) selections/select all/float/defloat add a new
layer and flood fill with black, add a white gradient glow to this.
duplicate, image/flip, image mirror place on the other side of the big
circle to where it lines up.
layers 10 and 13 select all/float/defloat add new layer and fill with
black again. select none and delete original.
layers 8, 6 and 9 paper 20
layers 11, 7,5,4 and 2 paper just place on different parts of the paper for
each section to your liking.
layers 3 and 1 paper 16.
and the top stars layers 18 and 19.
____________________________
layer 17 add paper 20 resize by 70%
delete original.
layer 16 add paper 25 resize by 70%
delete original layer.
layer 15 select all/float/defloat add a new layer and flood fill with
black. select none and delete original layer.
layer 14 (The word art) selections/select all/float/defloat add a new
layer and flood fill with black, add a white gradient glow to this.
duplicate, image/flip, image mirror place on the other side of the big
circle to where it lines up.
layers 10 and 13 select all/float/defloat add new layer and fill with
black again. select none and delete original.
layers 8, 6 and 9 paper 20
layers 11, 7,5,4 and 2 paper just place on different parts of the paper for
each section to your liking.
layers 3 and 1 paper 16.
add white gradient glow to the edges off all your layers. ( I like doing this for
when im going to animate a tag)
_________________________________________
when im going to animate a tag)
_________________________________________
layer 12 (the wa in the circle) add a black gradient glow to this.
go ahead and add your first tube as a new layer to your tag.
_____________________________________
ok now we can add elements (i'm using alot of elements so
just going to put what the sizes are you can see my tag for placement
and also add your own elements from there kit there are alot to choice from.)
_____________________________________
element 52 (spider web) resize by 30% place over to the right
duplicate and take out the part hanging over the edges.
element 46 resize by 30%
element 10 resize by 50% and then again by 70%.
element 50 resize by 50% place like the skull is biting down on it.
duplicate , flip and mirror and place to the bottom right.
element 134 resize by 70% , rotate to the right, flip and use your
deform tool place under long rectangle at the bottom.
duplicate and mirror.
element 106(the stars) place under the big circle taking out the parts hanging
over the left and right rectangles at the top. duplicate and place over the circle.
element 124 resize by 30% place to the right of the tag duplicate and mirror.
element 32 resize by 30% place to the right of tag.
element 114 (the cat) resize by 50% place under element 32 and above the
flower. on the right.
element 67 (the bat wing potion) resize by 30%
element 5 (the little smoke) resize by 30% mirror place over potion.
element 116 (the glass pumpkins) resize by 30% place behind the potion.
element 58 (the pot with frog feet hanging out) resize by 30%
______________________________________________
ok now we are going to set up our animation, x out everything except
the small inner black circle click inside with your magic wand, paste
element 7 (the frog) or any other element as a new layer. if your using
the same tube as me or any tube really just place where you like it
in the middle, kinda line it up with the frog, selections/invert and hit
delete on both the frog and the tube layer, just to get whats hanging over the
edges. place both under the circle layer.
open back up all the layers except the frog leave him out for a min.
_______________________________________
at this time you can go ahead and add your copyright info and name if
you wish, I went ahead and resized all layers to 80% just make
sure you sharpen your tube layers and any other layers you think look blurry.
_________________________________________
OK now X out the background layer , the top tube layer and the frog
copy/merged on the top of the tag, take over to animation shop
paste as a new animation.
go back to psp and change the opacity of the tube inside the circle to
90% , go back to animation shop, right click on the tag and paste after
current frame.
back to psp change opacity of the tube to 95% back to animation shop
right click on the second frame and paste after current animation
keep doing this , changing the tube opacity to
80%
85%
75%
70%
65%
60%
55%
50%
40%
and 45%
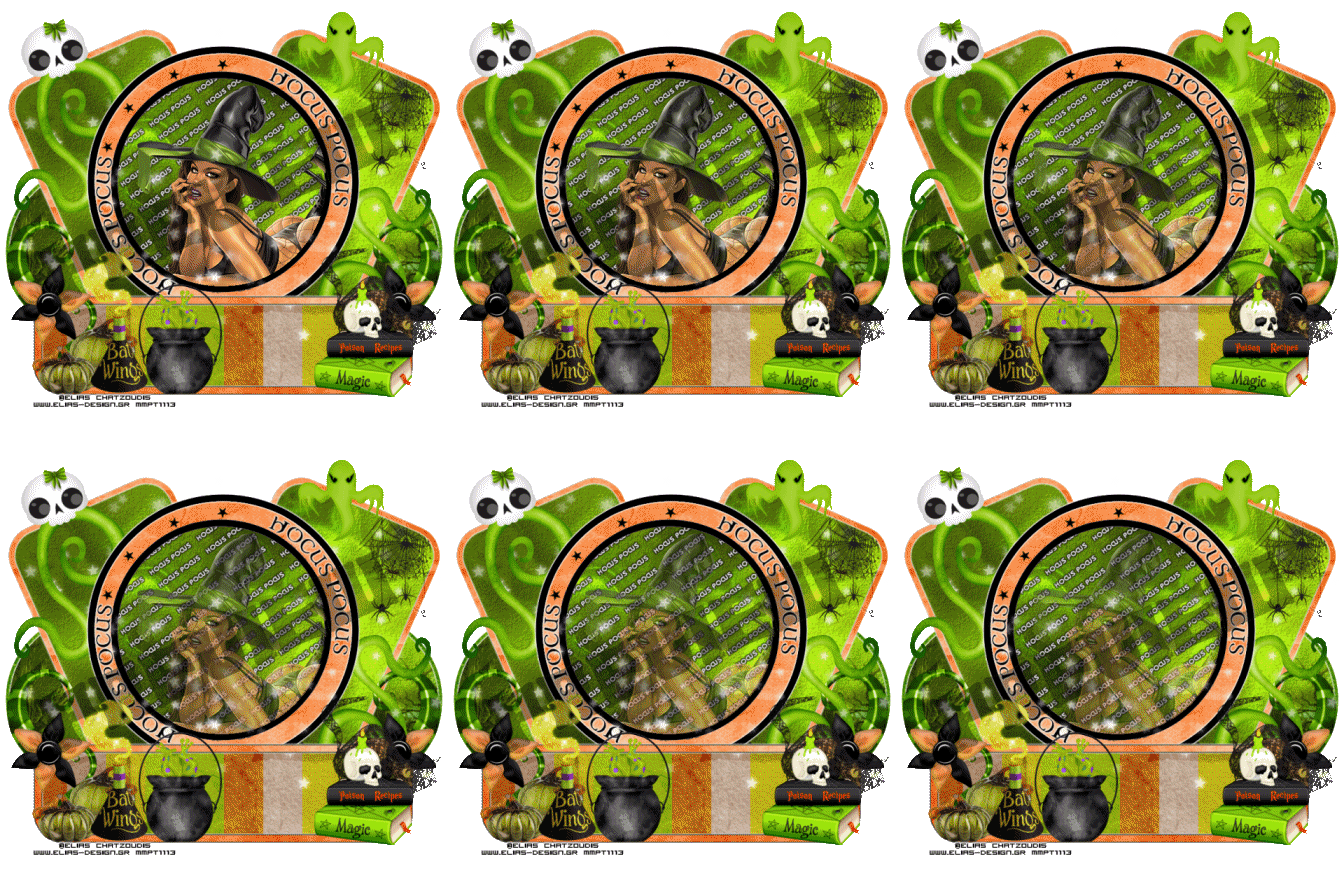
now when you have 12 frames with the middle tube
view your animation you should have something like this.
go ahead and add your first tube as a new layer to your tag.
_____________________________________
ok now we can add elements (i'm using alot of elements so
just going to put what the sizes are you can see my tag for placement
and also add your own elements from there kit there are alot to choice from.)
_____________________________________
element 52 (spider web) resize by 30% place over to the right
duplicate and take out the part hanging over the edges.
element 46 resize by 30%
element 10 resize by 50% and then again by 70%.
element 50 resize by 50% place like the skull is biting down on it.
duplicate , flip and mirror and place to the bottom right.
element 134 resize by 70% , rotate to the right, flip and use your
deform tool place under long rectangle at the bottom.
duplicate and mirror.
element 106(the stars) place under the big circle taking out the parts hanging
over the left and right rectangles at the top. duplicate and place over the circle.
element 124 resize by 30% place to the right of the tag duplicate and mirror.
element 32 resize by 30% place to the right of tag.
element 114 (the cat) resize by 50% place under element 32 and above the
flower. on the right.
element 67 (the bat wing potion) resize by 30%
element 5 (the little smoke) resize by 30% mirror place over potion.
element 116 (the glass pumpkins) resize by 30% place behind the potion.
element 58 (the pot with frog feet hanging out) resize by 30%
______________________________________________
ok now we are going to set up our animation, x out everything except
the small inner black circle click inside with your magic wand, paste
element 7 (the frog) or any other element as a new layer. if your using
the same tube as me or any tube really just place where you like it
in the middle, kinda line it up with the frog, selections/invert and hit
delete on both the frog and the tube layer, just to get whats hanging over the
edges. place both under the circle layer.
open back up all the layers except the frog leave him out for a min.
_______________________________________
at this time you can go ahead and add your copyright info and name if
you wish, I went ahead and resized all layers to 80% just make
sure you sharpen your tube layers and any other layers you think look blurry.
_________________________________________
OK now X out the background layer , the top tube layer and the frog
copy/merged on the top of the tag, take over to animation shop
paste as a new animation.
go back to psp and change the opacity of the tube inside the circle to
90% , go back to animation shop, right click on the tag and paste after
current frame.
back to psp change opacity of the tube to 95% back to animation shop
right click on the second frame and paste after current animation
keep doing this , changing the tube opacity to
80%
85%
75%
70%
65%
60%
55%
50%
40%
and 45%
now when you have 12 frames with the middle tube
view your animation you should have something like this.
___________________________________________
Edit/Select all
open up your animation (aura by missy) Edit/select all
Edit/propagate paste, Edit/copy
Edit/propagate paste, Edit/copy
go over to your tag, Edit/paste into selected frames. when the
animation comes up you only see a little dot or atleast thats all i see lol
line it up in the middle like right under her eye.
view the animation.
animation comes up you only see a little dot or atleast thats all i see lol
line it up in the middle like right under her eye.
view the animation.
go back to psp x out this tube and un X the frog layer
go back to animation shop and click on the very last frame of the tag
right click on only it! and paste after current frame.
right click on this frame with the frog change the frame properties
to 80%.
go to the very first frame and right click and change the frame properties
to 80% as well.
view your animation if your happy with it select all
go back to psp copy your tube, go back to animation shop paste
as a new animation, then copy this again go to your tag and paste into selected
frames. do not let go until you have your tube where you want it on the tag.
go back to psp copy your tube, go back to animation shop paste
as a new animation, then copy this again go to your tag and paste into selected
frames. do not let go until you have your tube where you want it on the tag.
if you waited like i did to add your name you would add your name in psp
and copy it and take it to animation shop and paste it like you did the tube.
and save.
and copy it and take it to animation shop and paste it like you did the tube.
and save.
I hope you enjoyed this tutorial. if you have any question or comments please
feel free to ask.
feel free to ask.
Saturday, September 6, 2014
Deadly Desire
tutorial written on Sept 5th 2014
tutorial written on Sept 5th 2014

supplies needed :
psp 9 and animation shop 3 (optional very easy animation)
good working knowledge of both the programs
Dark souls scrapkit by Scrappin with lil ole me
you can purchase her awesome dark kit here.
tube of choice or you can use the one im suppling by free to use artist
Anna Ignatieva
word art not sure who the creator of this is if you know or its you
please let me know so i can credit the person.
My Supplies
Missy template 378 download here
Simone Animation 419 you can download on here blog here.
font of choice, i used my bloody valentine download here
Filter: eye candy 4000 gradient glow
Missy template 378 download here
Simone Animation 419 you can download on here blog here.
font of choice, i used my bloody valentine download here
Filter: eye candy 4000 gradient glow
ok lets get started shall we ?
Open up your template in psp
shift D to duplicate.
shift D to duplicate.
Image/resize canvas by 750, we can resize later.
delete the copyright , both heart layers, the light rectangle,dotted square
circle 1 and 2.
circle 1 and 2.
ok select square copy paper 22 as a new layer, resize by 70%
paste your tube as a new layer, move her over to the left a little if you
want to like i did because her finger is kinda chopped off lol.
duplicate the tube layer. selections/invert hit delete on the original tube
layer and on the paper layer. select none.
use your selection tool to delete the parts of the tube that are hanging over
the square.
___________________________________________
select square 1, paster paper 22 again , resize by 70% , invert and hit
delete. repeat the steps for square 2 , 3 and 4.
delete all orignal layers.
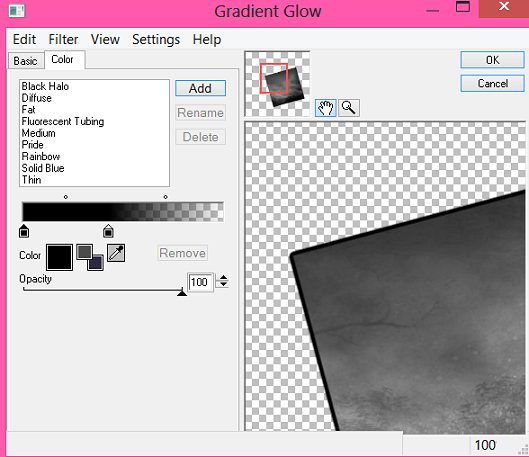
add a black gradient glow ,glow width 3/soft corners 25/opacity 100
move slidder over like this in preview.

____________________________________________
select your thin rectangle and paste paper 12 as a new layer place how
ever you want it. delete original layer.
________________________________________________
paste element 15 (the moon) resize by 30 % place to the right
and place behind all layers except the last square layer on the bottom.
element 126 resize by 70%, rotate to the left by 5 %, move under your tube layer
and that square layer, (see my tag) Duplicate, mirror and flip move over
to the right a little. this is what you should have.

_______________________________________________
element 19 resize by 70% move to the right under your tube layer
duplicate and mirror.
element 95 resize by 70% move to the left and place below your tube layer
duplicate, mirror and place to the bottom right.
________________________________________
element 18 resize by 70% move to the left of the tag, under the above layer.
element 3 resize by 30% and place to the left of the tag.
element 12 resize by 30% place beside above layer.
element 87 rotate to the left by 90 degrees and place behind your flower.
element 2 resize by 70% place under these layers.
add your deadly desire word art as a new layer. see my tag for placement.
______________________________
after adding all your elements add more if you like. merge all layers.
if your going to animate this tag, add a white gradient glow to your
merged tag. ( I think when doing a blk tag its best to use the glow)
paste your tube as a new layer, move her over to the left a little if you
want to like i did because her finger is kinda chopped off lol.
duplicate the tube layer. selections/invert hit delete on the original tube
layer and on the paper layer. select none.
use your selection tool to delete the parts of the tube that are hanging over
the square.
___________________________________________
select square 1, paster paper 22 again , resize by 70% , invert and hit
delete. repeat the steps for square 2 , 3 and 4.
delete all orignal layers.
add a black gradient glow ,glow width 3/soft corners 25/opacity 100
move slidder over like this in preview.
____________________________________________
select your thin rectangle and paste paper 12 as a new layer place how
ever you want it. delete original layer.
________________________________________________
paste element 15 (the moon) resize by 30 % place to the right
and place behind all layers except the last square layer on the bottom.
element 126 resize by 70%, rotate to the left by 5 %, move under your tube layer
and that square layer, (see my tag) Duplicate, mirror and flip move over
to the right a little. this is what you should have.
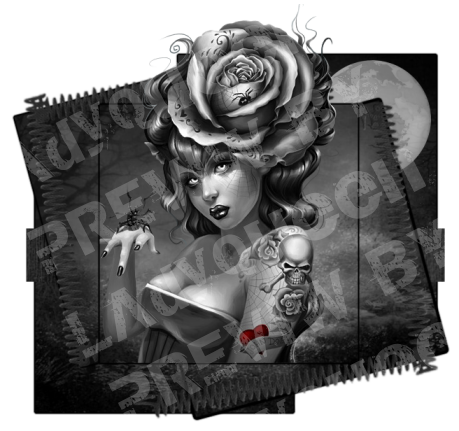
_______________________________________________
element 19 resize by 70% move to the right under your tube layer
duplicate and mirror.
element 95 resize by 70% move to the left and place below your tube layer
duplicate, mirror and place to the bottom right.
________________________________________
element 18 resize by 70% move to the left of the tag, under the above layer.
element 3 resize by 30% and place to the left of the tag.
element 12 resize by 30% place beside above layer.
element 87 rotate to the left by 90 degrees and place behind your flower.
element 2 resize by 70% place under these layers.
add your deadly desire word art as a new layer. see my tag for placement.
______________________________
after adding all your elements add more if you like. merge all layers.
if your going to animate this tag, add a white gradient glow to your
merged tag. ( I think when doing a blk tag its best to use the glow)
add your copyright info and your name to the tag.
resize by 90% change canvas size to 700x700 and just crop as close
as you can get without cutting the tag off.
resize by 90% change canvas size to 700x700 and just crop as close
as you can get without cutting the tag off.
Ok time to animate.
Go over to animation shop
open up Simone animation 419 edit/select all and resize by 60%
go back to psp copy merged on your tag, copy
and paste as a new layer in animation shop.
Go over to animation shop
open up Simone animation 419 edit/select all and resize by 60%
go back to psp copy merged on your tag, copy
and paste as a new layer in animation shop.
Duplicate the tag for as many frames as we have in the animation. for this one
we have 21.
we have 21.
edit/propagate paste checked,
on your tag edit/select all
select all on the animation
right click on your tag
edit/paste/into selected frame.
place right over the little potion bottle.
view your animation and if your happy with your results save.
on your tag edit/select all
select all on the animation
right click on your tag
edit/paste/into selected frame.
place right over the little potion bottle.
view your animation and if your happy with your results save.
I hope you enjoyed this tutorial.
Tuesday, November 19, 2013
Snow Queen
written by LadyQueen on 11/18/13

supplies needed for this tutorial
psp or any version
animation shop
baby its cold outside kit by Pimp'd designz you can purchase it here
snow animation you can download here I've had this snow forever
animation shop
baby its cold outside kit by Pimp'd designz you can purchase it here
snow animation you can download here I've had this snow forever
not sure who made it , but if you did please let me know so I can give proper credit.
tube of choice you can purchase vinegar tubes at CDO
tube of choice you can purchase vinegar tubes at CDO
fonts used , SantasSleigh and Snowhouse Demo you can get those here at dafont.com
HERE
Filters: eye candy 4000 shadow lab (optional)
Filters: eye candy 4000 shadow lab (optional)
lets get started.
open up a new 650x650 transparent image
copy and paste border 1 as a new layer
resize by 90
duplicate border Image/rotate/free rotate /right 90%
duplicate and Image/Mirror
duplicate the top layer again Image/flip bring it down to the bottom so
that you have a rectangle or frame shape. this is what you should have now.

merge all the border layers together.
Adjust/Sharpen
Adjust/Sharpen
leave this open in psp we will need it again.
open a new 650x650 transparent image
flood fill the bg with white just so you can see what your doing if you want.
flood fill the bg with white just so you can see what your doing if you want.
copy your frame as a new layer
image/resize by 80%
adjust/sharpen
Image/rotate/free rotate left by 15 degrees
duplicate the frame ,Image/mirror.
x out the bg layer and merge these two frame layers together.
resize again by 90% adjust/sharpen
I used eye candy 4000 shadow lab on the frame but this is optional you can use
which ever settings you want.
settings I used : Center offset direction=356, Center offset distance =3.55 Overall opacity=60
Overall blur=4.14 Perspective Blur = 0 color black draw only outside selection checked.
which ever settings you want.
settings I used : Center offset direction=356, Center offset distance =3.55 Overall opacity=60
Overall blur=4.14 Perspective Blur = 0 color black draw only outside selection checked.
with your magic wand tool tolerance set to 7 and feather 0
select the inside of the frame and all empty spaces.
select the inside of the frame and all empty spaces.
Selections/modify/expand by 8
copy and paste paper 8 as a new layer , do not deselect.
bring this layer down under your merged frame
open up animation shop and open up your snow animation
edit/select all
File/export frames to paint shop pro
this will bring the snow to psp leave animation shop open.
edit/select all
File/export frames to paint shop pro
this will bring the snow to psp leave animation shop open.
click on the snow frame 1 copy and go back to your tag still with the marching ants
around it, right click paste as a new layer.
around it, right click paste as a new layer.
go back to the snow copy frame 2 and go back to your tag paste as a new layer.
repeat these steps with all 5 snow frames. rename each frame starting from the bottom
snow 1, snow 2 and so on this is what your tag should look like now.
snow 1, snow 2 and so on this is what your tag should look like now.

Selections/Invert and starting from the last snow frame you added to your tag
you should have 7 layers. hitting delete on each snow layer and the paper layer we
added before. Selections/select none.
this is what you should have
you should have 7 layers. hitting delete on each snow layer and the paper layer we
added before. Selections/select none.
this is what you should have
and your layer palette should be the bg layer at the bottom

rename your snow layers and this is what your layer palette should look like

X out your snow animation in psp its going to ask you if you want to save changes
push no and then its going to ask you if would like to update back to animation shop
push yes.
push no and then its going to ask you if would like to update back to animation shop
push yes.
you can close out your snow animation.
and go back to psp
open up the frame you made earlier and paste it as a new layer over your tag
resize by 70%.
resize by 70%.
select the inside of the frame with your magic wand. Selections/modify/expand by 2
paste paper 4 as a new layer. bring under your frame layer.
paste your tube as a new layer , duplicate and move the duplicated tube under
the frame but above your paper layer.
Selections/invert hit delete on your paper layer and your duplicated tube layer.
Selections/select none. add the same drop shadow as before on this frame.
add a few of the snow flakes to your tag resizing them to your liking add the diamond
elements (see my tag
for placement)
elements (see my tag
for placement)
I wanted to add the words snow queen this is optional or you can just add your name like
this. I used Snowhouse Demo foreground color white background color #243341
size 36 stroke width 2.0
this. I used Snowhouse Demo foreground color white background color #243341
size 36 stroke width 2.0
add your name same settings except i put the blue at the top and white at the bottom and used
Santas Sleigh font.
Santas Sleigh font.
add your cr and license to your tag.
Ok now its time to animate..
x out all snow layers except snow layer 1 and your bg layers in psp
copy merged on your tag go to animation
shop ,right click and paste as a new animation.
copy merged on your tag go to animation
shop ,right click and paste as a new animation.
go back to psp x out snow 1 and un x snow 2, copy merged and go back to animation shop
right click inside the tag there paste after current frame.
right click inside the tag there paste after current frame.
go back to psp x out snow 2 and un x snow 3 paste back to animation shop after
your second frame. keep doing this for all 5 snow layers.
view your animation and save your tag thats it , hope you enjoyed this tutorial.
Saturday, November 16, 2013
Peppermint Twist
tutorial written by LadyQueen 11/16/13
CT-PIMP'D Designz
CT-PIMP'D Designz

supplies needed for this tutorial :
paint shop pro 9 /any version should work
animation shop/optional
Scrapkit Candy Girl Collab (Pimp'd designz) you can get this beautiful kit HERE
you buy the tube you get the whole collab kit free for a LIMITED TIME so HURRY!
template made by me you can download that here
font I used Candy
paint shop pro 9 /any version should work
animation shop/optional
Scrapkit Candy Girl Collab (Pimp'd designz) you can get this beautiful kit HERE
you buy the tube you get the whole collab kit free for a LIMITED TIME so HURRY!
template made by me you can download that here
font I used Candy
Ok lets get started.
Open up my template
delete the cr info
delete the cr info
select rec 1 in your layer palette, Selections/select all/float/defloat
copy and paste paper 10 as a new layer do not deselect. go back to paper 10,
Image/mirror copy and paste the paper as a new layer , Selections/invert hit delete on
the keyboard on both paper layers. Selections/select none.
delete original layer
(If animating)
rename your paper layers, in your layer palette, rename the first paper to left 1
and the second paper to left 2
rename your paper layers, in your layer palette, rename the first paper to left 1
and the second paper to left 2
select rec 3 . Selections/select all/float/defloat copy and paste paper 10 as a new layer
and then mirror the paper again copy and paste again on your tag. Selections/invert
hit delete on your keyboard,on both paper layers. Selections/select none.
delete original layer
rename right paper 1 , right paper 2
and then mirror the paper again copy and paste again on your tag. Selections/invert
hit delete on your keyboard,on both paper layers. Selections/select none.
delete original layer
rename right paper 1 , right paper 2
select rec 2 Selections/select all/float/defloat copy paper 6 as a new layer do not deselect
go back to your paper mirror, copy and paste as a new layer again. Selections/invert
hit delete on your keyboard on both layers. Selections/select none.
delete original layer
rename these layers, middle 1, middle 2
go back to your paper mirror, copy and paste as a new layer again. Selections/invert
hit delete on your keyboard on both layers. Selections/select none.
delete original layer
rename these layers, middle 1, middle 2
in your layer pallette select your circle layer, Selections/select all/float/defloat
copy and paste paper 2 as a new layer. Selections/invert hit delete on your keyboard
Selections/select none.
copy and paste paper 2 as a new layer. Selections/invert hit delete on your keyboard
Selections/select none.
click on your outter circle layer selections/select all/float/defloat copy and paster paper 3
as a new layer. Selections/invert hit delete on your keyboard. Selections/select none.
delete original
as a new layer. Selections/invert hit delete on your keyboard. Selections/select none.
delete original
right click on your right frame layer in the layer palette, view current layer only
with your magic wand click inside the red rectangle
in your material box change your foreground color to white and your bg layer to #cf000b
make a gradient Angle=0 repeats=15
add a new raster layer and flood fill with your gradient
Selections/select none.
with your magic wand click inside the red rectangle
in your material box change your foreground color to white and your bg layer to #cf000b
make a gradient Angle=0 repeats=15
add a new raster layer and flood fill with your gradient
Selections/select none.
go back to the right frame and with your magic wand click inside the black square
copy and paste paper 1 as a new layer.Selections/invert hit delete on the keyboard.
on your right frame layer add a drop shadow with these settings.
Vertical=0 horizontal=0 Opacity=60 blur=5 color black
copy and paste paper 1 as a new layer.Selections/invert hit delete on the keyboard.
on your right frame layer add a drop shadow with these settings.
Vertical=0 horizontal=0 Opacity=60 blur=5 color black
repeat these same steps with the left frame
go back to your layer pallete right click and view all.
go back to your layer pallete right click and view all.
click on your shape layer, selections/select all/float/defloat copy and paste paper 4
as a new layer. Selections/invert hit delete on your keyboard. Selections/select none.
as a new layer. Selections/invert hit delete on your keyboard. Selections/select none.
copy and paste frame 3 from the kit , resize by 60 % move to where it will line up
with the shape on the other side. take your selection tool and go around the frame
on the left side , hit delete on your keyboard. select none.
with the shape on the other side. take your selection tool and go around the frame
on the left side , hit delete on your keyboard. select none.
copy and paste your tube as a new layer, resize by 50% and then again by 70%
Adjust/sharpen
Adjust/sharpen
move your tube to where you want it on your tag or (see my tag for reference)
with your selection tool cut out some of the mints from the tube background
and paste them as a new layer on the tag, see my tag again for placement.
add a drop shadow to your tube with these settings.
vertical=2 horizontal=1 opacity=60 blur=5 color black
copy and paste lollipop 1 from the kit as a new layer resize by 30% move over to
the left of the tag. copy and paste string 1 from the kit, resize by 20% move over
your lollipop.
the left of the tag. copy and paste string 1 from the kit, resize by 20% move over
your lollipop.
copy and paste the candy cane as a new layer resize by 50% move to the right of your tag
duplicate your string and move it over your candy cane. (see tag for placement)
duplicate your string and move it over your candy cane. (see tag for placement)
copy and paste print 2 move it to the bottom of your tag , Image/mirror
at this time you can go ahead and add your copyright info to the tag
and your name.
and your name.
if you wish to animate continue reading if not your all done save your tag :)
Open up animation shop:
with all layers open click on your tag in psp copy merged
go to animation shop and paste as a new animation.
go to animation shop and paste as a new animation.
go back to psp x out right 1, middle 1 and left 1 copy merged
go to animation shop , right click inside the tag paste after current frame.
still in animation shop go to edit select all. go to animation/frame properties
display time set to 50 , view animation and if your happy save your tag.
go to animation shop , right click inside the tag paste after current frame.
still in animation shop go to edit select all. go to animation/frame properties
display time set to 50 , view animation and if your happy save your tag.
non animated version

Monday, November 11, 2013
Like a Boss
CT-PIMP'D Designz
CT-PIMP'D Designz

Supplies needed : psp 9 or any version should work
Scrapkit : Goff by Pimp'd Designz you can purchase the kit HERE at Totally sweet Designz
Tube by Dave Nestler you need a license to use these tubes purchased at CDO
like a boss template by Cakes you can download HERE on her blog.
smoke animation #271 by Simone you can grab there HERE
filters used : eye candy 4000 gradient glow and shadow lab (optional)
texture/blinds comes with psp
Scrapkit : Goff by Pimp'd Designz you can purchase the kit HERE at Totally sweet Designz
Tube by Dave Nestler you need a license to use these tubes purchased at CDO
like a boss template by Cakes you can download HERE on her blog.
smoke animation #271 by Simone you can grab there HERE
filters used : eye candy 4000 gradient glow and shadow lab (optional)
texture/blinds comes with psp
font Jeffriana JF you can get it HERE
Ok lets get started.
Open up cakes template , dupicate the tube (shift and D on the keyboard)
close out original.
close out original.
delete the rectangle layer, circleagain layer ,the torqcircle,and both the stars from
the template.
click on the circl (the big blk circle) selections/select all/float/defloat
copy and paste paper 5 as a new layer, resize by 80% ,move down so the sparkles
are showing just a little at the top. Selections/invert and hit delete on the keyboard.
delete original layer.
copy and paste pd frame 1 as a new layer, resize by 80% and move over this layer.
copy and paste your tube as a new layer if your using the same tube place it so that
it looks as if she is hanging over the frame (see my tag for placement)
Effects/Plugins/Eye candy 4000/Shadowlab with these settings

it looks as if she is hanging over the frame (see my tag for placement)
Effects/Plugins/Eye candy 4000/Shadowlab with these settings

go to the word art layer, Selections/select all/Float/defloat add a new raster layer
flood fill with #a41213. Effects/Texture effects/Blinds with these settings.
width 2/opacity 100 color black horizonal and light from top both checked.
hit ok. Selections/select none.
flood fill with #a41213. Effects/Texture effects/Blinds with these settings.
width 2/opacity 100 color black horizonal and light from top both checked.
hit ok. Selections/select none.
delete the word art layer and merge the layer you just filled and the back layer together.
click on the small circle on the right, selections/select all/float/defloat add a new raster
layer and flood fill with #a41213 . effects/texture effects/blinds with these settings.
layer and flood fill with #a41213 . effects/texture effects/blinds with these settings.
width=4/opacity=100 horizonal and light from top unchecked. color white
selections/select none.
selections/select none.
click on another circle layer to your left, copy and paste paper 2 as a new layer.
you can do the same with another circle 2 at the bottom or you can delete it.
(my tube covers it up)
you can do the same with another circle 2 at the bottom or you can delete it.
(my tube covers it up)
on your square layer , selections/select all/float/defloat , add a new raster layer
flood fill with black.selections/select none. delete orginal layer.
effects/Texture effects/Blinds with these settings.
width=4/opacity=100/ horizonal and light from top checked, color white.
flood fill with black.selections/select none. delete orginal layer.
effects/Texture effects/Blinds with these settings.
width=4/opacity=100/ horizonal and light from top checked, color white.
on your rectangle layer, selections/select all/float/defloat add a new raster layer
flood fill with black. selections/select none. delete original layer.
add the same texture settings as before just change the color to black this time.
click on turqrec selections/select all/float/defloat copy and paste paper 3 as a new
layer. move so that the bright red is in the rec. Selections/invert and hit delete on
your keyboard. delete orginal layer.
layer. move so that the bright red is in the rec. Selections/invert and hit delete on
your keyboard. delete orginal layer.
on the turqrec2 layer selections/select all/float/defloat paste paper 6 as a new layer
move so that some of the design on the side is showing in the little space there.
Selections/invert hit delete on your keyboard. selections/selet none. delete original
layer.
move so that some of the design on the side is showing in the little space there.
Selections/invert hit delete on your keyboard. selections/selet none. delete original
layer.
copy and paste the print-01 element as a new layer, bring this layer to the bottom
move over to the left of your tag. duplicate this layer , Image/Mirror, Image/Flip.
move over to the left of your tag. duplicate this layer , Image/Mirror, Image/Flip.
copy and paste the hearts element as a new layer (i split them up so i could put one
on the bottom left and one on the top right. paste your lips element and resize
i resized by 50% a few times, use your raster deform tool to place them inside
the hearts (see my tag for placement) copy and paste the staples and put on your
tag where you like.
on the bottom left and one on the top right. paste your lips element and resize
i resized by 50% a few times, use your raster deform tool to place them inside
the hearts (see my tag for placement) copy and paste the staples and put on your
tag where you like.
Copy and paste the star 1 element and place behind your word art. I used eye candy
gradient glow to add to the star.
glow width-3/ soft corners=25/ opacity=100 color white
gradient glow to add to the star.
glow width-3/ soft corners=25/ opacity=100 color white
add your name and copyright to the tag , resize all layers 80% and save your tag.
animated version

if you want to animate your tag. open up animation shop
in psp on your tag copy merged, go to animation shop paste as a new animation.
with the mover took bring your tag down to the bottom of your image. just make sure
not to go to far down.
in psp on your tag copy merged, go to animation shop paste as a new animation.
with the mover took bring your tag down to the bottom of your image. just make sure
not to go to far down.
open up simones smoke animation 271 resize by 70%
there are 19 layers so duplicate your tag this many times.
on the smoke animation go to edit select all. copy
there are 19 layers so duplicate your tag this many times.
on the smoke animation go to edit select all. copy
on the tag go to edit select all. make sure edit propagate is checked.
paste your smoke into selection. place where you want the smoke to go before you
let go of the mouse.
let go of the mouse.
thats it your done ! I hope you enjoyed this tutorial, if you have any questions
or just want to show me your tag please email me at lady21r@hotmail.com
or just want to show me your tag please email me at lady21r@hotmail.com
tutorial written on 11/11/13
Wednesday, June 26, 2013
All Squared Up
tutorial written on 6/26/13
Big Thank you to Jaylyn for helping me name this. :)
Big Thank you to Jaylyn for helping me name this. :)

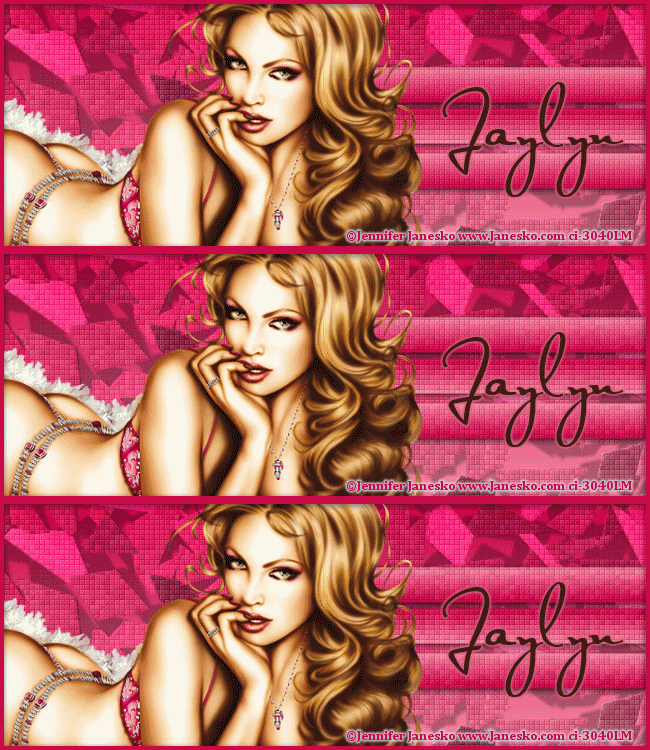
For this tutorial you will need
a tube of choice , I used the art work of Jennifer Janesko
you can find her tubes here.
Font of choice , I used Satisfaction
plugins-Xero/Fritillary and Alien Skins Xenofex 2/Shatter
psp 9 or any version should work and Animation shop.
a tube of choice , I used the art work of Jennifer Janesko
you can find her tubes here.
Font of choice , I used Satisfaction
plugins-Xero/Fritillary and Alien Skins Xenofex 2/Shatter
psp 9 or any version should work and Animation shop.
Ok lets get started.
Open a new 650x250 transparent image
pick two colors from your tube.
i used #c70045 for my fg color , #f789a1 for my bg color
click on gradient and find your fg/bg colors angle 180, repeats 0
style/linear. flood fill layer 1 with your gradient.
pick two colors from your tube.
i used #c70045 for my fg color , #f789a1 for my bg color
click on gradient and find your fg/bg colors angle 180, repeats 0
style/linear. flood fill layer 1 with your gradient.
duplicate this layer , Effects/Plugins Alien Skins Xenofex 2/Shatter
with these settings.
with these settings.
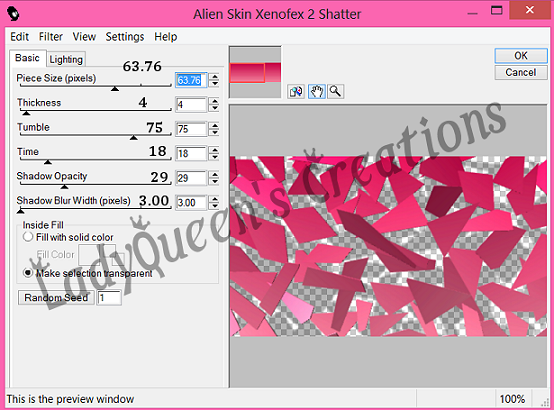
then add Effects/Plugins Xero/Fritillary with these settings.

Next copy and paste your tube as a new layer
place where you want it on your tag.
now with your preset shape tool..grab the rectangle tool
keep the gradient the same in the layer palette.
draw out a rectangle. convert to raster layer, duplicate this layer, image
flip and move up just a little over the first rectangle. duplicate this layer and move it
down under the first rectangle layer. See my tag for placement.
keep the gradient the same in the layer palette.
draw out a rectangle. convert to raster layer, duplicate this layer, image
flip and move up just a little over the first rectangle. duplicate this layer and move it
down under the first rectangle layer. See my tag for placement.
add a drop shadow Vertical=2/Horizonal=1/Opacity 71/Blur 9.00
or one of your choice.
or one of your choice.
X out your bg layer and your tube layer and merge your 3 rectangle layers together.
go back to layer 1 selections/select all/float/defloat, Selections/Modify/Contract by 4
Selections/Invert , add a new raster layer and flood fill with a color from your tube.
(I used #c70045)
Selections/Select None. Bring this layer to the top.
add a drop shadow Vertical=2/Horizonal=-1/Opacity 71/Blur 9.00
Selections/Invert , add a new raster layer and flood fill with a color from your tube.
(I used #c70045)
Selections/Select None. Bring this layer to the top.
add a drop shadow Vertical=2/Horizonal=-1/Opacity 71/Blur 9.00
go back to your rectangle layer duplicate twice for a total of 3 layers.
on the first layer add the xero fritillary with the same settings as before.
on the copy of this layer add the xero fritillary with the same settings just change
the variation to 7 and then on the 3rd copy change the variation to 9
on the first layer add the xero fritillary with the same settings as before.
on the copy of this layer add the xero fritillary with the same settings just change
the variation to 7 and then on the 3rd copy change the variation to 9
at this time you can go ahead and add your cr info license number if need be and your name
unless you wait til the end like i do.
unless you wait til the end like i do.
Ok Time to animate.
X out the 2 copies of your rectangle layer right click in the layer palette copy merged.
and go over to animation shop. paste as a new layer.
go back to psp x out rectangle layer 1 un X the first duplicated layer. right click copy
merged. go over to animation shop Click inside the first frame paste after current frame.
repeat these steps for the last layer in psp and animation shop.
view your animation and if your happy you can save your new tag.
X out the 2 copies of your rectangle layer right click in the layer palette copy merged.
and go over to animation shop. paste as a new layer.
go back to psp x out rectangle layer 1 un X the first duplicated layer. right click copy
merged. go over to animation shop Click inside the first frame paste after current frame.
repeat these steps for the last layer in psp and animation shop.
view your animation and if your happy you can save your new tag.
Hope you enjoyed this tutorial :)
Here is another example or the tag.
Here is another example or the tag.


Subscribe to:
Posts
(Atom)