Grab My Blinkie

I CT For


Friday, July 11, 2014
Matthews Many Faces of Beauty

supplies needed:
paint shop pro
font Young and beautiful you can find it at dafont . com here
template 8 by Mizteeque you can get it here
Dees beautiful freebie Kerade kit you can get this here
mask 53 from here
Filters/Eye candy/gradient glow (optional)
6 tubes of choice from the same artist
I used the art of Amy Matthews which you can purchase and use with
license from CDO
_________________________________________________________
template 8 by Mizteeque you can get it here
Dees beautiful freebie Kerade kit you can get this here
mask 53 from here
Filters/Eye candy/gradient glow (optional)
6 tubes of choice from the same artist
I used the art of Amy Matthews which you can purchase and use with
license from CDO
_________________________________________________________
Ok lets get started, this is a very simple tutorial
open up mizteeques template in psp, we can resize later.
shit D to duplicate, close out original.
shit D to duplicate, close out original.
delete the cr layer. and x out the background layer for now or you can delete
it as well.
it as well.
x out all other layers besides the frame layer.
with your magic wand click inside each of the squares of the frame.
Selections/modify/expand by 12
pick your first tube and paste as a new layer, and repeat until all faces are
inside your frames, copy paper 1 as a new layer resize by 110 to make it bigger.
put under all your tube layers.
inside your frames, copy paper 1 as a new layer resize by 110 to make it bigger.
put under all your tube layers.
Selections/invert and hit delete on your keyboard
for all the tube layers and this paper layer. Selections/select none.
for all the tube layers and this paper layer. Selections/select none.
erase any part of your tubes that are in any of the other frame boxes that is
not suppose to be there.
not suppose to be there.
Select your frame layer Selections/select all/float/defloat
copy paper 6 as a new layer resize by 110 you may have to move to the left
just a little . Selections/invert hit delete on your keyboard.
copy paper 6 as a new layer resize by 110 you may have to move to the left
just a little . Selections/invert hit delete on your keyboard.
Delete original frame layer.
now back on the layer palette un x the word art the doodles and the flower layers.
copy and paste your flower from the kit i used the first one there are two to choice
from. paste as a new layer on your tag , duplicate 2 times for a total of 3 flowers,
place over flowers in the template. add a drop shadow V&H=2 opacity 45 blur 5
color black. do this for all the flowers.
copy and paste your flower from the kit i used the first one there are two to choice
from. paste as a new layer on your tag , duplicate 2 times for a total of 3 flowers,
place over flowers in the template. add a drop shadow V&H=2 opacity 45 blur 5
color black. do this for all the flowers.
you can delete original flower layer.
go to your doodle layer, Selections/select all/float/defloat and paste paper 6
as a new layer. resize by 115 this time. Selections/invert hit delete on keyboard.
select none. and delete original layer. Adjust/add noise uniform checked
noise 50 ,monochrome checked, add same drop shadow as before.
delete original layer. add same drop shadow as before.
as a new layer. resize by 115 this time. Selections/invert hit delete on keyboard.
select none. and delete original layer. Adjust/add noise uniform checked
noise 50 ,monochrome checked, add same drop shadow as before.
delete original layer. add same drop shadow as before.
go to your word art layer, paste paper 8 as a new layer,Selections/invert and
delete on your keyboard. delete original layer.
delete on your keyboard. delete original layer.
on your new word art layer, go to Adjust/add & remove noise same settings as
before. go to effects/inner bevel and add these settings to the word art
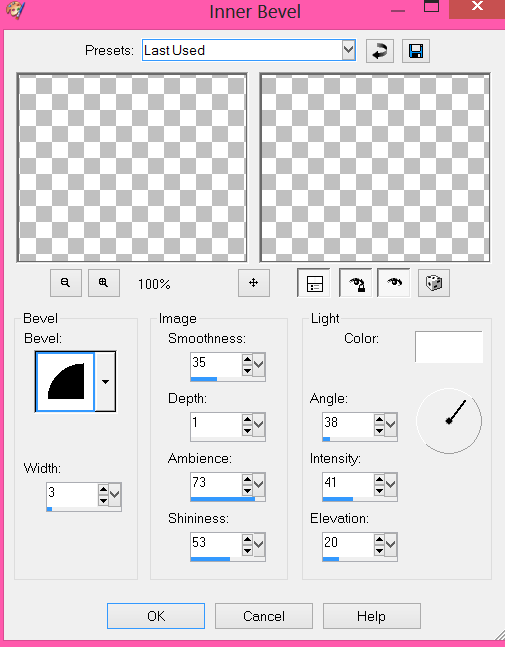
add drop shadow 2/2/45/5 color #035e5b
copy paper 7 as a new layer bring it to the very bottom resize by 125
apply your mask. I moved my mask a little to the left.
apply your mask. I moved my mask a little to the left.
you can now add the butterflies from the kit (see my tag)
and your copyright info to your tag.
and your copyright info to your tag.
for the name type it out with color #15665d add the same noise
as before, and with the same gradient glow we did on the word art.
image/rotate free rotate 7 to the left and place on left side of tag.
as before, and with the same gradient glow we did on the word art.
image/rotate free rotate 7 to the left and place on left side of tag.
merge all your layers together, i dont merge with my name because i want to
add more names later.
add more names later.
once this is done if you havent resized already, I always go to canvas size
resize by the size i want my tag , this time i went 655x655 and image resize
and resize my tag by 70%, all layers unchecked.
resize by the size i want my tag , this time i went 655x655 and image resize
and resize my tag by 70%, all layers unchecked.
your all finished now !! you can save your tag.
Thursday, July 10, 2014
Kiss my HoneyPot
tutorial written on 7/10/14

Supplies needed
psp 9 or any version
cute Beegirl tube by Eugene Rzhevskii you
must have license and purchase this tube here at Picsfordesign.
adorable fb freebie by Amy and Leah Kiss my Honey pot kit , follow them on
facebook to get this kit.
WSL_Mask154 from here
and 202insatiabledreams mask here
Template 115 by Pooker here
Font of choice, im using DJ Frilly
psp 9 or any version
cute Beegirl tube by Eugene Rzhevskii you
must have license and purchase this tube here at Picsfordesign.
adorable fb freebie by Amy and Leah Kiss my Honey pot kit , follow them on
facebook to get this kit.
WSL_Mask154 from here
and 202insatiabledreams mask here
Template 115 by Pooker here
Font of choice, im using DJ Frilly
____________________________________________________________
Ok lets get started
Open up your template in psp, shift D to duplicate close out
original.
original.
start by deleteing the cr layer,black dot, Black frame, White square
Black circle 1 and 2 and yellow dotted 1 and 2.
Black circle 1 and 2 and yellow dotted 1 and 2.
Ok, now we are ready lol
on Lt yellow square 3 , Selections/select all/float/defloat
paste paper 4 as a new layer. Selections/invert and hit delete on your keyboard.
selections/select none. Selections/Select all again, float/defloat/Selections/
modify/expand by 3. add a new raster layer and flood fill with #fdfb16 or any
bright yellow. bring this layer under your brown square. selections/select none.
paste paper 4 as a new layer. Selections/invert and hit delete on your keyboard.
selections/select none. Selections/Select all again, float/defloat/Selections/
modify/expand by 3. add a new raster layer and flood fill with #fdfb16 or any
bright yellow. bring this layer under your brown square. selections/select none.
repeat the same steps above for the Lt square 4, or you really dont have to
we will be covering this up later on, but just incase.
we will be covering this up later on, but just incase.
on the yellow rectangle leave this the yellow color that it is, and apply eyecandy
gradient glow, size 3 color blk.
gradient glow, size 3 color blk.
select the yellow circle, paste paper 3 as a new layer
select none, delete original. Selections/select all/float/defloat
Selections/contract by 3 add a new raster layer and flood fill with black.
keep selected , Selections/modify/contract again by 3 paste paper 3 as
a new layer, Selections/invert hit delete on your keyboard.
select none, delete original. Selections/select all/float/defloat
Selections/contract by 3 add a new raster layer and flood fill with black.
keep selected , Selections/modify/contract again by 3 paste paper 3 as
a new layer, Selections/invert hit delete on your keyboard.
go to your black rectangle layer, Selections/Select all/float/defloat
paste paper 4 as a new layer. ( the paper isnt big enough to fit right now
so you can duplicate it and move the duplicated one over to the right) Selections
/invert/ hit delete on keyboard on both of those layers.
selections/select none. delete the original layer.
paste paper 4 as a new layer. ( the paper isnt big enough to fit right now
so you can duplicate it and move the duplicated one over to the right) Selections
/invert/ hit delete on keyboard on both of those layers.
selections/select none. delete the original layer.
on the white rectangle layer. selections/select all/float/defloat
copy and paste paper 7 as a new layer duplicate it and move the paper
where you can see the buzz word in each sections/ Selections/invert
hit delete on keyboard on both paper layers. select none. delete original.
copy and paste paper 7 as a new layer duplicate it and move the paper
where you can see the buzz word in each sections/ Selections/invert
hit delete on keyboard on both paper layers. select none. delete original.
give both buzz paper layers a nice yellow gradient glow.
go to Lt yellow circle 3 copy and paste paper 2 as a new layer, place where
you want it in the circle. delete orginal layer. Selections/modify/expand by 3
flood fill with black. select none.
you want it in the circle. delete orginal layer. Selections/modify/expand by 3
flood fill with black. select none.
repeat steps for Lt yellow circle 2
copy the swirl element as a new layer, resize by 80% move to the right of tag
and move this layer to the bottom. add a nice yellow gradient glow to the element.
duplicate/mirror and then flip, duplicate this layer mirror, resize by 80%
use your deform tool to move to the right a little, see my tag for placement.
and move this layer to the bottom. add a nice yellow gradient glow to the element.
duplicate/mirror and then flip, duplicate this layer mirror, resize by 80%
use your deform tool to move to the right a little, see my tag for placement.
copy frame 3 as a new layer resize by 80% and move behind the big
yellow circle. (see my tag)
yellow circle. (see my tag)
ok now open up a new 650x650 transparent image flood fill with a yellow
color and apply WSL_Mask 154
color and apply WSL_Mask 154
now go back over to your tag and select the black rectangle
selections/select all/float/defloat and paste the mask that you just made
as a new layer..selections/invert and hit delete on your keyboard.select none.
selections/select all/float/defloat and paste the mask that you just made
as a new layer..selections/invert and hit delete on your keyboard.select none.
k now go back to your swirl layer to the top right and click inside with your magic
wand. selections/modify/expand by 3 grab the drip element paste as a new
layer, and resize by 50% move under the swirl layer, selections/invert hit delete
on your keyboard. selections/select none.
wand. selections/modify/expand by 3 grab the drip element paste as a new
layer, and resize by 50% move under the swirl layer, selections/invert hit delete
on your keyboard. selections/select none.
copy and paste paper 6 as a new layer bring down to the very bottom, this
paper isnt big enough so resize by 150% and apply insatible dreams mask202.
paper isnt big enough so resize by 150% and apply insatible dreams mask202.
add the flower brad to the top left resize by 80% move to the top left.
add your tube no need to resize if your using the same tube as i am.
add brad 1 resize by 60%
add your tube no need to resize if your using the same tube as i am.
add brad 1 resize by 60%
add your label resize by 80% move behind your tube, and use your
deform tool to shrink so you can see the words. adjust/sharpen.
add any other elements or just copy what i did
merge all your layers together add your name and cr info to the tag and your
done.
done.
I hope you enjoyed this tutorial.
Friday, June 13, 2014
Beware of the Dogs
tutorial written 6/13/14

supplies needed
psp any version
psp any version
font used Beware of the dog you can get it at dafont.com
eye candy gradient glow(optional)
Xero- Greytinter
WSL_mask363 you can download here 4th mask down
Dees Paws-itively template you can get this here on her blog
eye candy gradient glow(optional)
Xero- Greytinter
WSL_mask363 you can download here 4th mask down
Dees Paws-itively template you can get this here on her blog
Dogs Time scrapkit by Bibi you can purchase kit ScrapsnCompany
Dogstime tube by the Hunter which you can also purchase at scrapsncompany.
______________________________________________________
K lets get started :)
open up your template in psp
shift D to duplicate the temp, x out the original
shift D to duplicate the temp, x out the original
Delete the cr layer, all the word art , the paw, small circles
top and bottom torquise strip, bottom and top aqua strip and the bottom
white and yellow circle.
top and bottom torquise strip, bottom and top aqua strip and the bottom
white and yellow circle.
Resize your canvas 750x 750 we can resize later
Whew ok we can continue.
Whew ok we can continue.
start on your bg layer, paste element 31(the fence) resize by 70%
apply WSL_mask363 to this element.
apply WSL_mask363 to this element.
paste element 49 as a new layer, resize by 70% move to the very bottom
apply the same mask again. Use your deform tool to pull down right up
under the yellow oval. (see my tag for refrence)
apply the same mask again. Use your deform tool to pull down right up
under the yellow oval. (see my tag for refrence)
ok now back to the template
Yellow oval paper 9
right turquoise layer paper 12
orange square paper 3
i used a gradient glow size 3/color black, this is optional you can use a
drop shadow or other gradient.
i used a gradient glow size 3/color black, this is optional you can use a
drop shadow or other gradient.
top yellow square paper 7
i added the same glow to this layer
delete original layers.
i added the same glow to this layer
delete original layers.
select paper 7layer again, selections/select all/float/defloat
copy your tube as a new layer and move to where only one of the dogs
faces are showing (see my tag for placement) selections/invert hit delete on
tube layer. select none.
copy your tube as a new layer and move to where only one of the dogs
faces are showing (see my tag for placement) selections/invert hit delete on
tube layer. select none.
white border flood fill with black. delete original
copy and paste your tube as a new layer again, resize by 80% move over
to the right just a tad. add a drop shadow Vertical and horizontal 2
opacity 43 ,blur 5 color black.
to the right just a tad. add a drop shadow Vertical and horizontal 2
opacity 43 ,blur 5 color black.
go back to the dog you have in the top square and delete any other part
of the tube you dont want there. duplicate the dog, on the original adjust/blur
gaussian blur /radius 10
of the tube you dont want there. duplicate the dog, on the original adjust/blur
gaussian blur /radius 10
on the top dog layer go to xero/greytinter
all settings set to 0 hit ok change to hard light in your layer palette.
all settings set to 0 hit ok change to hard light in your layer palette.
back on your square layer , selections/select all/float/defloat and paste
element 31 (the fence) resize by 70% , selections/invert and hit delete on your
keyboard.
element 31 (the fence) resize by 70% , selections/invert and hit delete on your
keyboard.
add same drop shadow as before.
add element 65 as a new layer resize by 50%
move to the right.
move to the right.
element 8 resize by 30 % and then again by 80% place on element 65
add element 78 , image/flip and move down
last add element 80 the beware sign. resize by 80%
we are all finished, at this time go ahead and add your cr info
and license number. and your name.
and license number. and your name.
I hope you enjoyed this tutorial would love to see your results.
Sunday, March 2, 2014
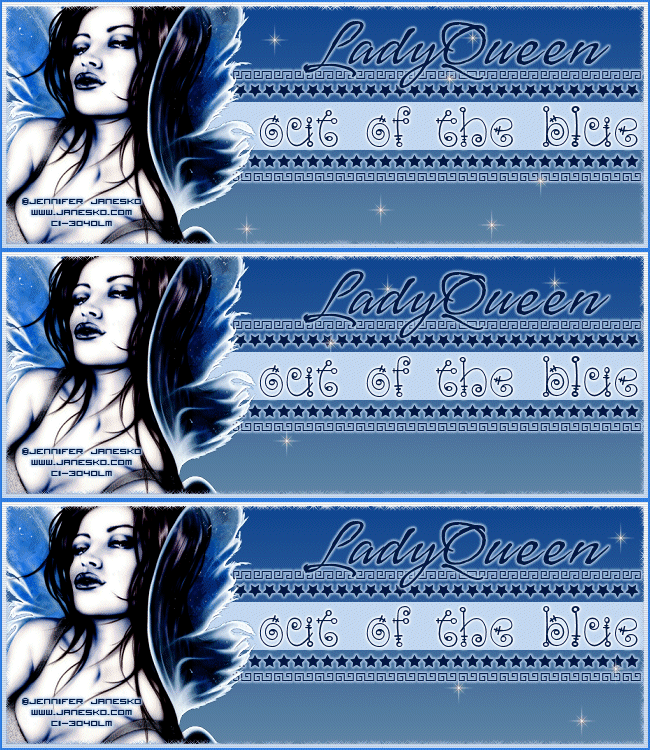
Out of the Blue/2 piece forum set
tutorial written on March 2nd, 2014
Supplies needed
Tube of your choice Im using the beautiful art of Jennifer Janesko
you can purchase her tubes Here at CDO
my supplies here
font used in tag word art Fairy tale and name Vujahday Flourish
open up a new 650x250 transparent image
change your foregroud color to #6086a4
and background color to #0c428e
in your materials make a gradient with the fg and bg colors
flood fill your image.
change your foregroud color to #6086a4
and background color to #0c428e
in your materials make a gradient with the fg and bg colors
flood fill your image.
copy and paste your tube as a new layer resize as needed.
go back to your bg layer Selections/select all/modify/contract
by 6 selections/invert add a new raster layer and change your foreground
color to #2c7ce3 and your bacground color to #eff8fc
with this new gradient flood fill this layer.
select none.
by 6 selections/invert add a new raster layer and change your foreground
color to #2c7ce3 and your bacground color to #eff8fc
with this new gradient flood fill this layer.
select none.
Effects/texture effects width=2,opacity=41 horizontal and light from top
checked. color white
checked. color white
bring this layer to the top.
Selections/select all/modify/contract by 2 this time add a new layer
flood fill with #2c7ce3
select none.
flood fill with #2c7ce3
select none.
go back to your first border layer..and duplicate 2 times for a total of 3 layers
you can rename these if you want.
you can rename these if you want.
go back down to the first border layer..effects/Xenofex2 contellation
with these settings

with these settings

hit ok.
use the same settings on the 2 copies just hit random seed each time
leave that for now.
go back down to your bg layer..copy and paste the twink border
that i put in the supplies for you. i also added a gradient glow to this
go to your selection tool/rectangle
draw out a rectangle in the middle of this border.(see my tag)
add a new raster layer. flood fill with #c0d8ef
selections/select none.
change your bg color to #001945 type out your saying or you can just add
your name here.
your name here.
i added a gradient glow with this color #c0d8ef (optional)
i put the word art i used in the supplies you can use this if you want
i put the word art i used in the supplies you can use this if you want
ok we are setting up more animation so go back to your bg layer
make a new raster layer..and with your twink picture tube in psp
put some twinks on your tag..i put like 5 on this layer.
put some twinks on your tag..i put like 5 on this layer.
add a new layer and put 4 more twinks on your tag just not over the others
placement is your choice.
placement is your choice.
you can keep adding layers and twinks thats up to you..i only did 3 since
i only have 3 layers for the bg animation. just play around til you find something
you like
i only have 3 layers for the bg animation. just play around til you find something
you like
once you are done with this you can add your name and cr/license info to your tags
its time to animate :)
Open animation shop
x the two copies of your constellation layer and your twink layers
un x the first one..copy your tag
un x the first one..copy your tag
bring over to animation shop paste as a new animation
back to psp , x out those contellation and twink layers, un x the second
layers. copy your tag take to animation shop and paste after current frame
and do the same steps , back to psp x out those layers and un x the
last layer.
layers. copy your tag take to animation shop and paste after current frame
and do the same steps , back to psp x out those layers and un x the
last layer.
once your happy with your animation you can save your tag :)
now on to the avatar part of the set.
open up a new image 150x150
follow the same steps on the borders with your avatar as
you did with the banner..same steps with the filters and all.
i just did new layers and added twinks like we did in the banner
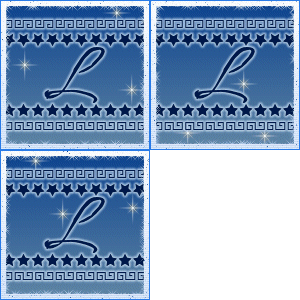
and added my initial.
follow the same steps on the borders with your avatar as
you did with the banner..same steps with the filters and all.
i just did new layers and added twinks like we did in the banner
and added my initial.
if you have any questions dont hesitate to contact me .
thanks for trying my tutorials.
thanks for trying my tutorials.
Thursday, February 27, 2014
Dancing in the dark

tutorial written on Feb 27th, 2014 in paint shop pro 9
but im sure can be done in any version.
Supplies needed
Awesome music of the night scrapkit by Crystal you can find that Here
mask 223 and 226 by Cat you can find those on her resource page Here
font used : NiteClub
template 503 by Minxy you can find on her blog Here
and word art by Melissa you can find on Misfits blog Here its in the second download
on music word art
tube by Keith Garvey you can purchase his tubes http://garv-girlspsptubes.pinnaclecart.com
tube by Keith Garvey you can purchase his tubes http://garv-girlspsptubes.pinnaclecart.com
Ok Lets get started
open up template 503, Resize your canvas 750x750 for now
delete layer 11 and the copy.
delete layer 11 and the copy.
on layer 6 copy and paste paper 2 as a new layer, delete original
on the copy of layer 6 copy and paste paper 2 as a new layer,delete the original
on raster layer 3 go to Selections/select all/float/defloat add a new raster layer
flood fill with #42677a , go to effects/texture effects/blinds with these settings.
width=4/Opacity=41 color white horizontal and light fromleft/top checked.
delete original
flood fill with #42677a , go to effects/texture effects/blinds with these settings.
width=4/Opacity=41 color white horizontal and light fromleft/top checked.
delete original
on copy of raster layer 3 do the same sets as above but un check the horizontal
and light from top.
and light from top.
selections/selectnone. delete original
go to raster 1 copy and paste paper 9 as a new layer
delete original and add eye candy 4000 gradient glow/size 3 white.
delete original and add eye candy 4000 gradient glow/size 3 white.
raster 8 copy and paste paper 7 as a new layer, delete original
on raster 10 Selections/select all/float/defloat add new layer
fill with #6c6c6c, go to Adjust/add and remove noise
uniform marked, noise 80% monochrome checked.
select none. delete original
fill with #6c6c6c, go to Adjust/add and remove noise
uniform marked, noise 80% monochrome checked.
select none. delete original
raster 2 copy and paste paper 10 as a new layer
delete original.
delete original.
on raster 7 Selections/select all/float/defloat add a new layer flood
fill with black. Selections/select none.
delete original.
fill with black. Selections/select none.
delete original.
on this same layer
go to image rotate/free rotate
left /free 45 %, move it down and over a little bit so that it lines up
with the square that is turned the same way. (see my tag for placement)
on raster 5 paste paper 3 as a new layer, delete original.
raster 9 paste paper 7 as a new layer, i moved it to where you could see
a few of the music notes. delete original.
a few of the music notes. delete original.
copy and paste element 40 from the kit (the street)
resize by 70%
move to the very bottom of the tag and move to where the sides line up
with the big square. (see my tag for placement)
resize by 70%
move to the very bottom of the tag and move to where the sides line up
with the big square. (see my tag for placement)
copy and paste element 10(the speakers) resize by 50% bring this layer
to the top,move to the left
duplicate/mirror and move more to the right.
to the top,move to the left
duplicate/mirror and move more to the right.
copy and paste element 5 the street light as a new layer, resize by 90%
and move to the left, duplicate and move the other one to the right(see my tag
for placement)
and move to the left, duplicate and move the other one to the right(see my tag
for placement)
copy and paste element 34(the moon) as a new layer
resize by 90% , Image/mirror, Image Flip
move under all layers except the rectangle in the back (see my tag)
resize by 90% , Image/mirror, Image Flip
move under all layers except the rectangle in the back (see my tag)
copy and paste element 39 (the birds) place over the moon (see my tag)
copy and paste element 17 (sparkles) place over your speakers.
copy your tube and place infront of the speakers and the sparkles
copy and paste your word art as a new layer
resize by 70%
Selections/select all/float/defloat add a new layer
flood fill with #3e5a6f
selections/select none. Adjust/add and remove noise
uniform checked, noise 80%
resize by 70%
Selections/select all/float/defloat add a new layer
flood fill with #3e5a6f
selections/select none. Adjust/add and remove noise
uniform checked, noise 80%
add gradient glow in white twice to the word art.
move in front of your tube
ok now go to your background layer, copy and paste paper 8 as
a new layer, add mask 223 resize by 90%
a new layer, add mask 223 resize by 90%
add a new raster layer flood fill with #eaeaea
add mask 226
add mask 226
at this time you can add your copy right info and license number
to your tag. Add your name I added a glow. and save your work.
to your tag. Add your name I added a glow. and save your work.
I hope you enjoyed this tutorial and would love to see any finished results.
Sunday, January 19, 2014
Love Struck (2 piece forum set)
tutorial written on Jan 1st, 2014 by LadyQueen


Supplies needed
psp 9
forum template 5 by Leah HERE
Lovely embrace scrapkit Acreativespacebetween
New lovely ptu tube by Bit's N' Bobs you can purchase here at Picsfordesign
font/fonts of choice
forum template 5 by Leah HERE
Lovely embrace scrapkit Acreativespacebetween
New lovely ptu tube by Bit's N' Bobs you can purchase here at Picsfordesign
font/fonts of choice
Simone animation 199/purple if your going to animate
get it here at Scrappy Bit of Fun
animation shop.
animation shop.
Ok lets get started.
open your banner template
delete cr layer and the splatter layer.
delete cr layer and the splatter layer.
on you bg layer selection/select all/float/defloat
copy and paste paper 2 as a new layer
add a new layer flood fill with #ae0000
selections/invert hit delete on your keyboard but make sure your
on the paper layer. Selection/select none.
on the flood fill layer change the blend mode to luminance (legacy)
copy and paste element 38 as a new layer resize by 70% twice
duplicate/mirror. and on your flood fill layer.selections/select all/float/defloat
Selections/invert hit delete on both heart layers. Selections/select none.
duplicate/mirror. and on your flood fill layer.selections/select all/float/defloat
Selections/invert hit delete on both heart layers. Selections/select none.
border 1 Selections/select all/float/defloat and flood fill with the same color
#ae0000, delete original.
#ae0000, delete original.
border 2 Selections/select all/float/defloat copy and paste any one of
the white papers as a new layer,Selections/invert hit delete on your keyboard
deselect.
delete original
Select the rec 2 layer, copy and paste paper 1 as a new layer
selections/invert hit delete on your keyboard, delete original.
selections/invert hit delete on your keyboard, delete original.
circle 2 , selections/select all/float/defloat add a new layer and flood
fill with the red color from before #ae0000 delete original
Effects/texture effects/blinds width 3, opacity 30 color blk
horizontal and lift from left/top checked.
fill with the red color from before #ae0000 delete original
Effects/texture effects/blinds width 3, opacity 30 color blk
horizontal and lift from left/top checked.
on rec 1 selections/select all/float/defloat add a new layer and flood
fill with #dc1919. selections/select none. delete original layer.
fill with #dc1919. selections/select none. delete original layer.
on your dotted rectangle layer, Selections/select all/float/defloat
copy and paste a red paper of choice, Selections/invert hit delete
on your keyboard. Selections/select none. delete original layer.
copy and paste a red paper of choice, Selections/invert hit delete
on your keyboard. Selections/select none. delete original layer.
copy and paste your tube as a new layer resize by 70% move to the left.
move under all your border layers.
move under all your border layers.
select circle 1 Select all/float/defloat flood fill with #dc1919
select none, delete original. add a blk gradient glow to this layer
or just a drop shadow of your choice.
select none, delete original. add a blk gradient glow to this layer
or just a drop shadow of your choice.
copy and paste element 42 as a new layer place over this circle
(see my tag for placement)
(see my tag for placement)
with your text tool font Valentine In Love type out struck by love
over your rec layer. (see my tag)
over your rec layer. (see my tag)
ok now at this time you need to add your cr info to your tag
and your name i used AlexBrush. and added a glow to it.
and your name i used AlexBrush. and added a glow to it.
you can save your tag as it is now or you can continue to follow this
tutorial and animate.
tutorial and animate.
for the animation you need to open animation shop
find your animation open it up
Edit/select all File/export frame to psp
this will bring it up in paint shop pro
starting from frame 1 make sure its selected in the layer palette
go to adjust/hue and saturation
hue:255 Saturation 248 hit ok.
find your animation open it up
Edit/select all File/export frame to psp
this will bring it up in paint shop pro
starting from frame 1 make sure its selected in the layer palette
go to adjust/hue and saturation
hue:255 Saturation 248 hit ok.
do this for all 11 layers.
at this point go to your tag and x out your name , the element and
cr if its over the circle layer.
cr if its over the circle layer.
select your circle .Selections/select all/float/
defloat. Selections/modify contract by 3 if you added a gradient glow
before like i did.if not just select the circle.
defloat. Selections/modify contract by 3 if you added a gradient glow
before like i did.if not just select the circle.
go back to your animation in psp starting from frame 1 copy and
paste on your banner as a new layer, dont move anything just leave it there.
do this for all 11 layers.
paste on your banner as a new layer, dont move anything just leave it there.
do this for all 11 layers.
you can name your layers if this helps.
when you are finished, go to selections/invert and hit delete on each of
the heart layers you just added.
the heart layers you just added.
Selections/select none.
ok un x the layers you x'ed out before, make sure layer 1 of
your animation in psp is un x'ed (i renamed mine heart 1-11)
copy merges on your tag
your animation in psp is un x'ed (i renamed mine heart 1-11)
copy merges on your tag
take to animation shop paste as a new layer
go back to psp x out your heart layer 1 and un x layer 2
copy merged and go over to animation shop , paste after current frame.
copy merged and go over to animation shop , paste after current frame.
keep doing this for all layers going from psp back to animation shop
paste after current frame each time, make sure in animation shop
you are on the last frame that your copied over there.
paste after current frame each time, make sure in animation shop
you are on the last frame that your copied over there.
when your finished view your animation and if your happy with it
save your tag
save your tag
keep animation open so you can use on your avatar
___________________________________________________________
avatar
Love Struck avatar
use the same instructions as the banner except
for these few instructions here.
for these few instructions here.
on your background layer selections/select all/float/defloat
paste paper 2 as a new layer resize by 50% and then again by 60%
selections/invert hit delete on keyboad. Select none.
paste paper 2 as a new layer resize by 50% and then again by 60%
selections/invert hit delete on keyboad. Select none.
on the middle circle or cir1 select all flood fill with #dc1919
delete original. add gradient glow or drop shadow.
delete original. add gradient glow or drop shadow.
if your animating, select the middle circle
select all/float/defloat. resize the heart animation you already
have open in psp.
select all/float/defloat. resize the heart animation you already
have open in psp.
if you closed it out like i did and have to restart.
resize by 70% then again by 80%
or resize to preference.
repeat the same steps as in the banner animation.
add your name or initial and thats it.
i hope you enjoyed this tutorial .
Saturday, December 28, 2013
Christmas
This tutorial was written on Dec 28th 2013
Supplies needed
psp any version should work
beautiful Silent night Scrapkit by Totally Sweet Designs you can purchase the kit
Winter mask you can find here Dangerously Delicious
word art you can find here
eye candy 4000 gradient glow.
font used Holiday house
Zindy tube can be purchased here do not use without license.
Zindy tube can be purchased here do not use without license.
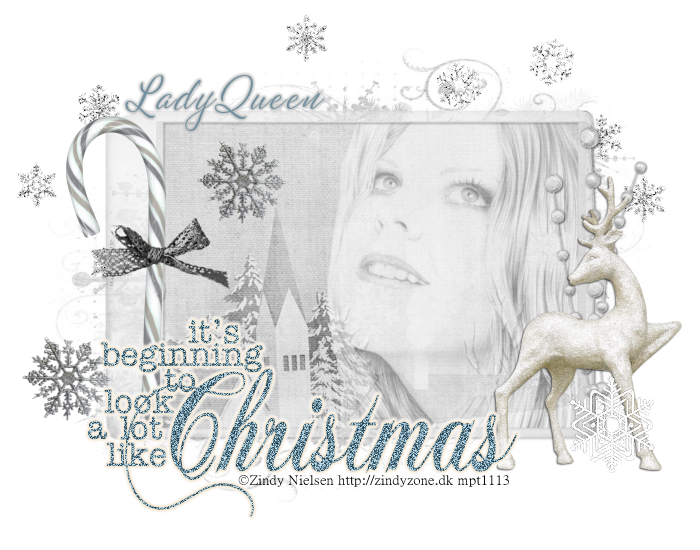
Ok lets get started
open up a new 700x550 transparent image
layers/new mask from image find your mask and apply to
this paper layer.
image/flip
copy and paste frame 3 as a new layer
resize by 80% open paper 1 , copy and paste as a new layer.
move up just a little (see my tag for refrence)
Selections/invert hit delete on this layer and your paper layer.
Select none.
on your frame layer add a drop shadow
1-1-49-3
copy and paste the word art as a new layer.
resize by 50% twice
move to the side of your frame (see my tag)
selections/select all, float, defloat
#7291a0, Selections/select none.
delete original layer.
add noise uniform 71%.
add eye candy again just change color to white.
add the reindeer resize by 50%, add branch 3 resize by 50% add
drop shadow of choice see tag for placements.
paste snowflake 3 as a new layer place behind frame but above your
mask layers. move to the top of tag.word art layer, (see tag for placement).
place over candy-cane
paste some of the bigger snowflakes from the kit and place on your tag.
add your cr and license to your tag, add your name.
thank you for trying my tutorial.
Subscribe to:
Posts
(Atom)