Grab My Blinkie

I CT For


Friday, August 22, 2014
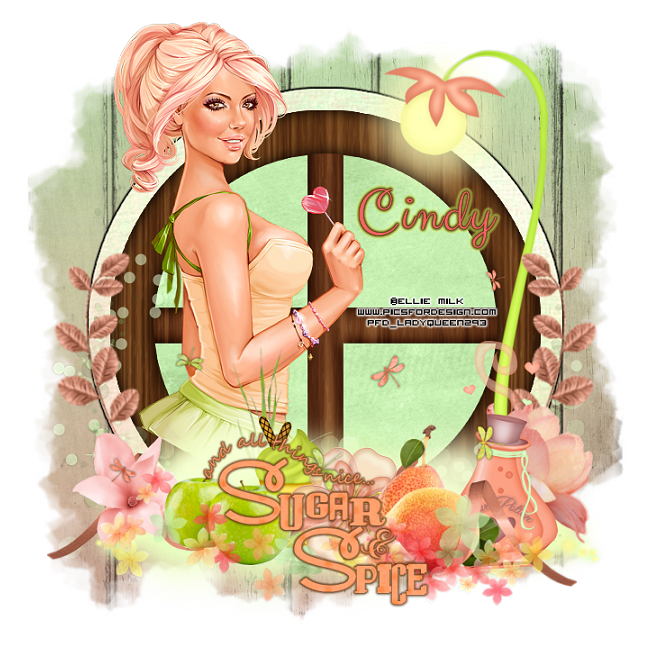
Sugar and Spice
tutorial written on 8/22/14
supplies needed :
paint shop pro
Font of choice i used Clicker Script
tube of your choice I am using the art of Ellie Milk you
can purchase the tubes here at picsfordesign
Sorbet dreams scrapkit by Scrapping with lil ole me
you can purchase the kit HERE
WSL_Mask363 you can download HERE
Word art by KittzKreationz you can download HERE
eye candy gradient glow/optional
________________________________________
ok lets get started
open up a new image 700X700 flood fill with white
copy and paste paper 28 as a new layer, apply wsl_mask 363
copy and paste paper 28 as a new layer, apply wsl_mask 363
paste element 12 as a new layer resize by 80%
x out your mask layer and click inside the middle of each section on
your element. Selections/select all/float/defloat paste paper5
as a new layer resize paper by 70% , Selection/invert hit delete on your
keyboard. Select none. merge these two layers together.
_______________________________________________
click on the outside of element 12 (the window element) with
your magic wand. paste paper 16 as a new layer. selections/modify/expand
by 2. selections/invert hit delete on the keyboard. Select none.
Image/resize by 110%
add a drop shadow vertical and horizontal=0 opacity 68 blur 4
color black.
your magic wand. paste paper 16 as a new layer. selections/modify/expand
by 2. selections/invert hit delete on the keyboard. Select none.
Image/resize by 110%
add a drop shadow vertical and horizontal=0 opacity 68 blur 4
color black.
_______________________________________________
x out your merged layer, selections/select all/float/defloat on the big
circle. copy and paste your tube as a new layer i had to resize mine by 50% and
then again aby 70%. , move to the left of your tag (see my finished tag)
duplicate your tube, selections/invert and hit delete on the original
erase the parts of the tube hanging over the big circle.
________________________________________
ok now lets add some elements
element 9 resize by 90% image/mirror place to the right of the tag.
element 91 place to the bottom of the tag over your tube.
element 22 resize by 50% and use your deform tool to make it look like
it wraps around the frame. duplicate and mirror (see my tag)
element 48 and use deform tool to stretch it just a little to your liking.
place other elements of your choice or see my tag to make it the same.
thats totally up to you now.
___________________________________
paste your word art as a new layer resize by 70%
selections/select all/float/defloat and paste paper 25
as a new layer selections/invert hit delete on your keyboard.
use your gradient glow size 3 color #623818
add your copyright info and license on tags and your name. resize
and save.
and save.
I hope you enjoyed this tutorial. If you have any questions
or would like to share what you have made leave me a comment or
email me . thanks for trying my tuts :)
or would like to share what you have made leave me a comment or
email me . thanks for trying my tuts :)
Subscribe to:
Post Comments
(Atom)
0 comments:
Post a Comment