Grab My Blinkie

I CT For


Thursday, July 31, 2014
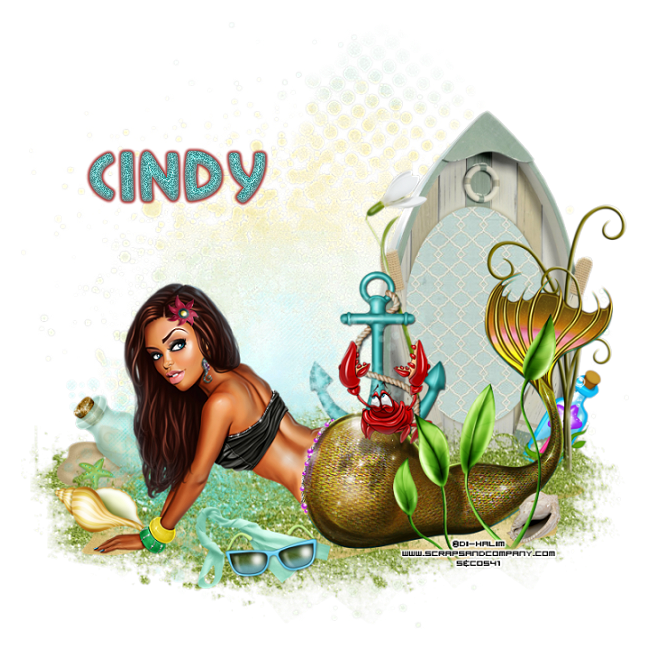
The little mermaid
Tutorial written on July 31st, 2014
supplies needed :
paint shop pro and a good knowledge of the program
tube of choice i used this cute mermaid tube by Di-Halim you can find his tubes
at ScrapsandCompany
sparkle mask 5 (just right click and save the mask, not sure where to find
this on the net i cant find it , if you know please email me and let me know so i
can give credit.)
tube of choice i used this cute mermaid tube by Di-Halim you can find his tubes
at ScrapsandCompany
sparkle mask 5 (just right click and save the mask, not sure where to find
this on the net i cant find it , if you know please email me and let me know so i
can give credit.)

Island adventure kit by scrapping with lil ole me you can purchase this cute
kit HERE
for the name i used treasure island font http://www.dafont.com/search.php?q=treasure+island
(for the font I used dsb flux bright noise and added a gg this is optional
so did not write out steps.
OK lets get started, This is a very easy tut
more copy and paste so did not point out every little detail like i normaly
do in a tut lol sorry, I just see more tuts are being wrote this way and seems to be the
way people are going.
more copy and paste so did not point out every little detail like i normaly
do in a tut lol sorry, I just see more tuts are being wrote this way and seems to be the
way people are going.
Ok forreal this time lol
open a new 750x750 transparent image
flood fill with white, we can resize later.
______________________________________
copy paper 7 as a new layer and apply the sparkle mask 5
___________________________________
copy and paste element 91 as a new layer
resize by 90% and move towards the bottom a little.
duplicate move down a little.
add this element again and resize by 80%
move to the left a little, mirror and move to the right
basically make a cluster out of this element.
just whatever looks good to you.
__________________________________
next paste element 105 (the boat) as a new layer
resize by 70%
move to the right and move this layer under one of your grass layers,but
on top of the others.
view current only, click inside the boat frame with your magic wand
selections/expand by 2, paste paper 14 as a new layer. Selections/invert
and hit delete on your keyboard. move this layer under your boat.
________________________________________
paste element 71 as a new layer resize by 80% mirror, and move under your
green glitter layers. see my tag for placement
_______________________________________
green glitter layers. see my tag for placement
_______________________________________
add your tube as a new layer, i had to resize mine by 50% and then again by 90%
add element 71 (the anchor) resize by 40% place over the boat and add drop shadow.
element 67 resize by 30% mirror and place to the left of the tag.
element 48 resize by 20% place over by the boat.
element 70 (the glasses) resize by 20% place in front of tube.
element 23 resize by 20%
element 78 resize by 50% place on boat and behind anchor.
element 11 resize by 50%
element 82 resize by 50%
element 85 resize by 50% place behind tube
element 104 and 73 resize by 20%
after adding all your elements add your copyright info and name to your tag
resize and save. Hope you enjoyed the tutorial would love to see your results. :)
Wednesday, July 23, 2014
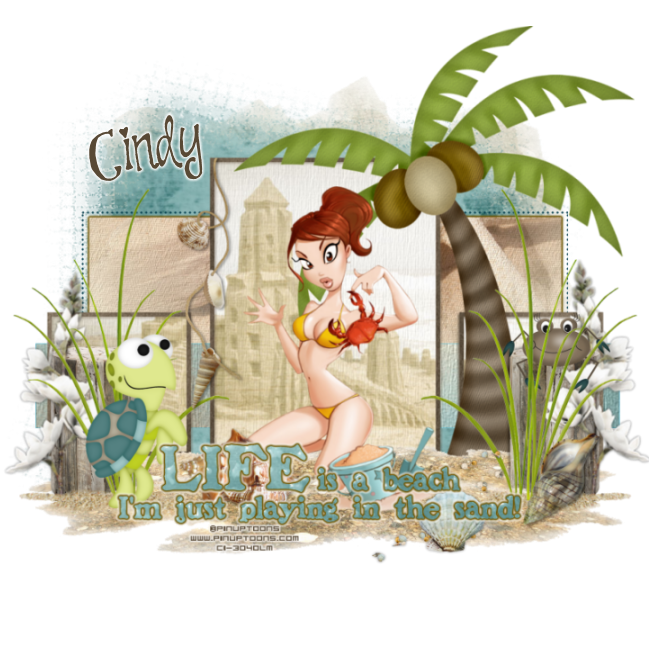
Playing in the sand
tutorial written on 7/23/14
tutorial written on 7/23/14
supplies needed:
paint shop pro any version should do
Sand Castle scrapkit by Scrapping with lil ole me you can purchase the kit
paint shop pro any version should do
Sand Castle scrapkit by Scrapping with lil ole me you can purchase the kit
you can get it on here blog creatingg with Millie HERE
tube im using a pinup tube you can purchase this at CDO
tube im using a pinup tube you can purchase this at CDO
must purchase and have license to use this tube.
eye candy/waterdrops & gradient glow
eye candy/waterdrops & gradient glow
Font i used SP pretty Purkey its free you can download here
_____________________________
_____________________________
ok lets get started
open up template 001cwm, shift d to duplicate, close out original.
delete copyright layer
image/ canvas size/ width 800 height 750 we can resize the tag later.
select layer 6 of the temp, select all/float/defloat and paste paper 26 as
a new layer, resize by 80% duplicate twice for a total of 3 layers. close out the
duplicated ones, selections/invert and hit delete on keyboard.
delete original layer.
________________
a new layer, resize by 80% duplicate twice for a total of 3 layers. close out the
duplicated ones, selections/invert and hit delete on keyboard.
delete original layer.
________________
go to layer 8 the left square, Selections/select all/float/defloat move one of the duplicated papers to the top of
this layer, selections/invert hit delet on your keyboard. Select none. delete original square layer.
this layer, selections/invert hit delet on your keyboard. Select none. delete original square layer.
do the same for layer 9 moving the last duplicated paper layer to the top of it.
we are doing this so that the 1 paper is in all 3 squares lined up together.
but feel free to use different papers how ever you like.
_____________________
we are doing this so that the 1 paper is in all 3 squares lined up together.
but feel free to use different papers how ever you like.
_____________________
go to layer 2 and merge down with layer 1, Selections/select all/float/defloat
copy paper 14 as a new layer resize by 70% and move down inside merged
layer where you want it. selections/invert hit delete on keyboard. Select none
delete original merged layer.
you can add a drop shadow or like i did and add eye candy gradient glow
color #705704
_________________________________________
go to layer select layer 5 paste paper 17 as a new layer.
selections/invert hit delte on keyboard. selections/select none.
delete original layer.
____________________________________________
selections/invert hit delte on keyboard. selections/select none.
delete original layer.
____________________________________________
k go back to the frame layer/ layer 7 copy and paste paper 2 as a new layer
and use paper 2 for the other two frames as well. layer 10 and 11.
________________________________________________
and use paper 2 for the other two frames as well. layer 10 and 11.
________________________________________________
now go to layer 12 your word art layer. select all, and paste paper
13 as a new layer. apply eye candy 4000 water drops with these settings.
delete original layer. add gradien glow with the same color as before.
and then again with a white glow.
______________________________________________
13 as a new layer. apply eye candy 4000 water drops with these settings.
delete original layer. add gradien glow with the same color as before.
and then again with a white glow.
______________________________________________
lets move down to our background layer, paste paper 10 as a new layer
resize by 80% apply wsl_mask128.
paste paper 18 as a new layer and apply wsl_mask 152.
__________________
resize by 80% apply wsl_mask128.
paste paper 18 as a new layer and apply wsl_mask 152.
__________________
copy and paste your tube as a new layer i resized mine by 80%
move under the word art layer.
element 101 (the palm tree), resize by 80% and place to the right.
paste element 37(the sand) as a new layer under your tube,
element 93 resize by 30% move to the right of the tag, duplicate
mirror.
move under the word art layer.
element 101 (the palm tree), resize by 80% and place to the right.
paste element 37(the sand) as a new layer under your tube,
element 93 resize by 30% move to the right of the tag, duplicate
mirror.
go back to the sand layer, duplicate and move above layer 93 (the piece of wood)
and mirror image. and bring down just a little under your word art layer.
add drop shadow of your choice to these two layers.
----------------------------------
see my tag for placements of elements. or go your own way its up to you :)
and mirror image. and bring down just a little under your word art layer.
add drop shadow of your choice to these two layers.
----------------------------------
see my tag for placements of elements. or go your own way its up to you :)
element 21 resize by 70% and move to the right over the wood layer there.
duplicate ,mirror
element 13(the little crab) resize by 20% and put on top of right piece of wood.
element 99, resize by 40% mirror and place to the left under the word art.
element 96 resize by 30% place under word art layer.
element 10 resize by 15% or more and place over to the right.
element 98 resize by 15% place over sand.
element 15 resize by 15%. move under word art.
element 105 resize by 50%, rotate to the left 90 degrees
use your deform tool to move it back to the right and line up with
wood , add drop shadow of choice, duplicate and mirror.
at this point some of the mask was hanging under the tag so i used
my selections tool and deleted the excess of both mask layers.
my selections tool and deleted the excess of both mask layers.
Thats it, you can now add any other elements you like, your copyright info
and name to your tag resize and save.
and name to your tag resize and save.
Hope you enjoyed my tutorial :)
Sunday, July 20, 2014
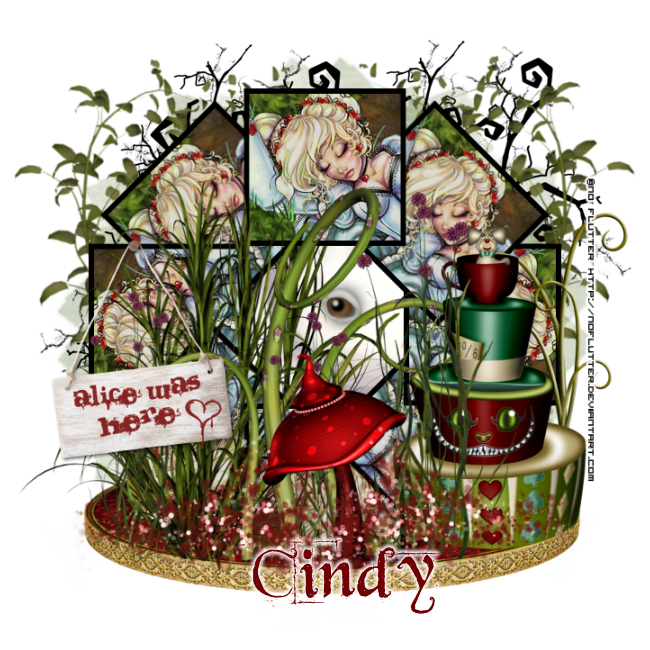
Down the Rabbit Hole
Tutorial writtne on July 20th, 2014
Tutorial writtne on July 20th, 2014
Supplies needed:
Paint shop pro
Mad about Alice scrapkit by Scrappin with Lil Ole me you can purchase this kit HERE
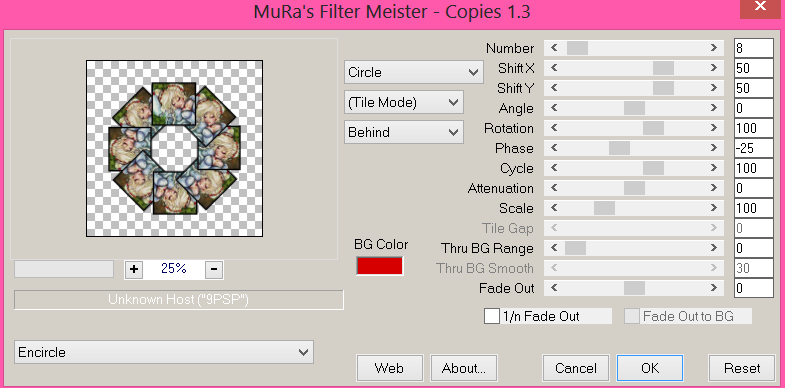
Mura's meister copies
font i used Beyond Wonderland you can find here at dafont
my supplies includes square shape and free tube.
you can download on box here
tube ©noflutter this is a free to use artist. feel free to use tube of your choice.
WSLmask_142 HERE
__________________
Ok lets get started shall we ?
open a new 700x700 transparent image
flood fill with white we can delete this layer later.
flood fill with white we can delete this layer later.
open up the square provided or make one of your own around the same size.
select the middle of the square with your magic want. Selections/modify/expandy
by 2. Copy and paste paper of choice, I used paper 19 and moved it over to where
the leafs are showing, copy your tube as a new layer, Selections/invert and hti delete
on both of these layers. Selections/select none. move the paper and tube layer
underneat your frame. reduce opacity to 82 % on the tube. Merge visible with these
3 layers.
-------------
effects Mura's Meister Copies with these settings. Encircle
number change to 8
---------------------
with your magic wand click inside the middle of your shape. expand by 2 and
paste the rabbit from the kit as a new layer, no need to resize just place his eye
in the middle, Selections/invert and hit delete on your keyboard. Select none.
------------------------
add paper 8 or paper of your choice as a new layer bring to the bottom, apply WSL_mask 142
-----------------
copy and paster element 106 as a new layer resize by 70% move to the bottom
of your tag ( see my tag for placement) move under your mask layer.
-----------------------
view only the merged layer select the inside with magic wand, paste element 14
as a new layer move to the bottom over your rabbit layer, with rabbit eye still
showing a little. Selections/invert and hit
delete on the keyboard on this layer. Selections/select none.
---------------------
copy and paste this same element 14 as a new layer resize by 80% and bring
to the top and move to the left of the tag.
------------------
add element 2 as a new layer resize by 80% and move to the left a little.
----------------------
element 43 resize by 60% place on tag. Element 44 resize by 60% move to the
right of your tag.
--------------------------
paste element 72 as a new layer resize by 80% move to the bottom left of the tag
but over the mask , image/rotate to the right by 45%. move to the top (see my tag)
copy/duplicate image/mirror and place to the right of the tag.
------------------
element 54 resize by 50% move behind element 44.
----------
element 11 resize by 70% place on tag, I duplicated this and resized again by 70% and put
them around the other elements in the tag, you can place them where you want
them.
-------------
copy element 64 (the sign) as a new layer resize by 40% and place on tag. add
a drop shadown color black. verticle and horizonal 2/opacity 57, blur 5.
---------------
element 101 resize by 70% place under all layers. duplicate/mirror.
element 100 resize by 70% place to the right of tag over all the elements.
duplicate/mirror , merge these two layers, and use your eraser tool to
erase any hanging over the gold part of stand at the bottom. hope that makes sense.
---------
Ok we are finished, X out your background layer, merge all other layers together.
resize if need be and add your copyright and your name. and Save.
Thank you for trying to my tutorial.
Friday, July 11, 2014
Matthews Many Faces of Beauty

supplies needed:
paint shop pro
font Young and beautiful you can find it at dafont . com here
template 8 by Mizteeque you can get it here
Dees beautiful freebie Kerade kit you can get this here
mask 53 from here
Filters/Eye candy/gradient glow (optional)
6 tubes of choice from the same artist
I used the art of Amy Matthews which you can purchase and use with
license from CDO
_________________________________________________________
Ok lets get started, this is a very simple tutorial
open up mizteeques template in psp, we can resize later.
shit D to duplicate, close out original.
shit D to duplicate, close out original.
delete the cr layer. and x out the background layer for now or you can delete
it as well.
it as well.
x out all other layers besides the frame layer.
with your magic wand click inside each of the squares of the frame.
Selections/modify/expand by 12
pick your first tube and paste as a new layer, and repeat until all faces are
inside your frames, copy paper 1 as a new layer resize by 110 to make it bigger.
put under all your tube layers.
inside your frames, copy paper 1 as a new layer resize by 110 to make it bigger.
put under all your tube layers.
Selections/invert and hit delete on your keyboard
for all the tube layers and this paper layer. Selections/select none.
for all the tube layers and this paper layer. Selections/select none.
erase any part of your tubes that are in any of the other frame boxes that is
not suppose to be there.
not suppose to be there.
Select your frame layer Selections/select all/float/defloat
copy paper 6 as a new layer resize by 110 you may have to move to the left
just a little . Selections/invert hit delete on your keyboard.
copy paper 6 as a new layer resize by 110 you may have to move to the left
just a little . Selections/invert hit delete on your keyboard.
Delete original frame layer.
now back on the layer palette un x the word art the doodles and the flower layers.
copy and paste your flower from the kit i used the first one there are two to choice
from. paste as a new layer on your tag , duplicate 2 times for a total of 3 flowers,
place over flowers in the template. add a drop shadow V&H=2 opacity 45 blur 5
color black. do this for all the flowers.
copy and paste your flower from the kit i used the first one there are two to choice
from. paste as a new layer on your tag , duplicate 2 times for a total of 3 flowers,
place over flowers in the template. add a drop shadow V&H=2 opacity 45 blur 5
color black. do this for all the flowers.
you can delete original flower layer.
go to your doodle layer, Selections/select all/float/defloat and paste paper 6
as a new layer. resize by 115 this time. Selections/invert hit delete on keyboard.
select none. and delete original layer. Adjust/add noise uniform checked
noise 50 ,monochrome checked, add same drop shadow as before.
delete original layer. add same drop shadow as before.
as a new layer. resize by 115 this time. Selections/invert hit delete on keyboard.
select none. and delete original layer. Adjust/add noise uniform checked
noise 50 ,monochrome checked, add same drop shadow as before.
delete original layer. add same drop shadow as before.
go to your word art layer, paste paper 8 as a new layer,Selections/invert and
delete on your keyboard. delete original layer.
delete on your keyboard. delete original layer.
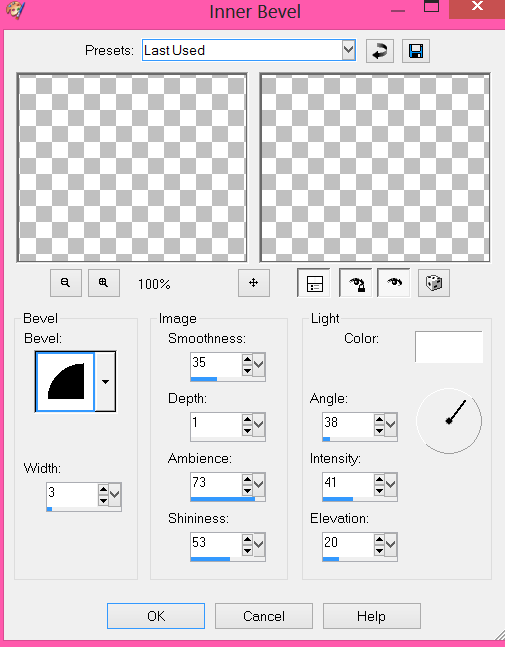
on your new word art layer, go to Adjust/add & remove noise same settings as
before. go to effects/inner bevel and add these settings to the word art
add drop shadow 2/2/45/5 color #035e5b
copy paper 7 as a new layer bring it to the very bottom resize by 125
apply your mask. I moved my mask a little to the left.
apply your mask. I moved my mask a little to the left.
you can now add the butterflies from the kit (see my tag)
and your copyright info to your tag.
and your copyright info to your tag.
for the name type it out with color #15665d add the same noise
as before, and with the same gradient glow we did on the word art.
image/rotate free rotate 7 to the left and place on left side of tag.
as before, and with the same gradient glow we did on the word art.
image/rotate free rotate 7 to the left and place on left side of tag.
merge all your layers together, i dont merge with my name because i want to
add more names later.
add more names later.
once this is done if you havent resized already, I always go to canvas size
resize by the size i want my tag , this time i went 655x655 and image resize
and resize my tag by 70%, all layers unchecked.
resize by the size i want my tag , this time i went 655x655 and image resize
and resize my tag by 70%, all layers unchecked.
your all finished now !! you can save your tag.
Thursday, July 10, 2014
Kiss my HoneyPot
tutorial written on 7/10/14

Supplies needed
psp 9 or any version
cute Beegirl tube by Eugene Rzhevskii you
must have license and purchase this tube here at Picsfordesign.
adorable fb freebie by Amy and Leah Kiss my Honey pot kit , follow them on
facebook to get this kit.
WSL_Mask154 from here
and 202insatiabledreams mask here
Template 115 by Pooker here
Font of choice, im using DJ Frilly
____________________________________________________________
Ok lets get started
Open up your template in psp, shift D to duplicate close out
original.
original.
start by deleteing the cr layer,black dot, Black frame, White square
Black circle 1 and 2 and yellow dotted 1 and 2.
Black circle 1 and 2 and yellow dotted 1 and 2.
Ok, now we are ready lol
on Lt yellow square 3 , Selections/select all/float/defloat
paste paper 4 as a new layer. Selections/invert and hit delete on your keyboard.
selections/select none. Selections/Select all again, float/defloat/Selections/
modify/expand by 3. add a new raster layer and flood fill with #fdfb16 or any
bright yellow. bring this layer under your brown square. selections/select none.
repeat the same steps above for the Lt square 4, or you really dont have to
we will be covering this up later on, but just incase.
we will be covering this up later on, but just incase.
on the yellow rectangle leave this the yellow color that it is, and apply eyecandy
gradient glow, size 3 color blk.
gradient glow, size 3 color blk.
select the yellow circle, paste paper 3 as a new layer
select none, delete original. Selections/select all/float/defloat
Selections/contract by 3 add a new raster layer and flood fill with black.
keep selected , Selections/modify/contract again by 3 paste paper 3 as
a new layer, Selections/invert hit delete on your keyboard.
select none, delete original. Selections/select all/float/defloat
Selections/contract by 3 add a new raster layer and flood fill with black.
keep selected , Selections/modify/contract again by 3 paste paper 3 as
a new layer, Selections/invert hit delete on your keyboard.
go to your black rectangle layer, Selections/Select all/float/defloat
paste paper 4 as a new layer. ( the paper isnt big enough to fit right now
so you can duplicate it and move the duplicated one over to the right) Selections
/invert/ hit delete on keyboard on both of those layers.
selections/select none. delete the original layer.
paste paper 4 as a new layer. ( the paper isnt big enough to fit right now
so you can duplicate it and move the duplicated one over to the right) Selections
/invert/ hit delete on keyboard on both of those layers.
selections/select none. delete the original layer.
on the white rectangle layer. selections/select all/float/defloat
copy and paste paper 7 as a new layer duplicate it and move the paper
where you can see the buzz word in each sections/ Selections/invert
hit delete on keyboard on both paper layers. select none. delete original.
copy and paste paper 7 as a new layer duplicate it and move the paper
where you can see the buzz word in each sections/ Selections/invert
hit delete on keyboard on both paper layers. select none. delete original.
give both buzz paper layers a nice yellow gradient glow.
go to Lt yellow circle 3 copy and paste paper 2 as a new layer, place where
you want it in the circle. delete orginal layer. Selections/modify/expand by 3
flood fill with black. select none.
you want it in the circle. delete orginal layer. Selections/modify/expand by 3
flood fill with black. select none.
repeat steps for Lt yellow circle 2
copy the swirl element as a new layer, resize by 80% move to the right of tag
and move this layer to the bottom. add a nice yellow gradient glow to the element.
duplicate/mirror and then flip, duplicate this layer mirror, resize by 80%
use your deform tool to move to the right a little, see my tag for placement.
and move this layer to the bottom. add a nice yellow gradient glow to the element.
duplicate/mirror and then flip, duplicate this layer mirror, resize by 80%
use your deform tool to move to the right a little, see my tag for placement.
copy frame 3 as a new layer resize by 80% and move behind the big
yellow circle. (see my tag)
yellow circle. (see my tag)
ok now open up a new 650x650 transparent image flood fill with a yellow
color and apply WSL_Mask 154
color and apply WSL_Mask 154
now go back over to your tag and select the black rectangle
selections/select all/float/defloat and paste the mask that you just made
as a new layer..selections/invert and hit delete on your keyboard.select none.
selections/select all/float/defloat and paste the mask that you just made
as a new layer..selections/invert and hit delete on your keyboard.select none.
k now go back to your swirl layer to the top right and click inside with your magic
wand. selections/modify/expand by 3 grab the drip element paste as a new
layer, and resize by 50% move under the swirl layer, selections/invert hit delete
on your keyboard. selections/select none.
wand. selections/modify/expand by 3 grab the drip element paste as a new
layer, and resize by 50% move under the swirl layer, selections/invert hit delete
on your keyboard. selections/select none.
copy and paste paper 6 as a new layer bring down to the very bottom, this
paper isnt big enough so resize by 150% and apply insatible dreams mask202.
paper isnt big enough so resize by 150% and apply insatible dreams mask202.
add the flower brad to the top left resize by 80% move to the top left.
add your tube no need to resize if your using the same tube as i am.
add brad 1 resize by 60%
add your tube no need to resize if your using the same tube as i am.
add brad 1 resize by 60%
add your label resize by 80% move behind your tube, and use your
deform tool to shrink so you can see the words. adjust/sharpen.
add any other elements or just copy what i did
merge all your layers together add your name and cr info to the tag and your
done.
done.
I hope you enjoyed this tutorial.
Subscribe to:
Posts
(Atom)