Grab My Blinkie

I CT For


Thursday, July 31, 2014
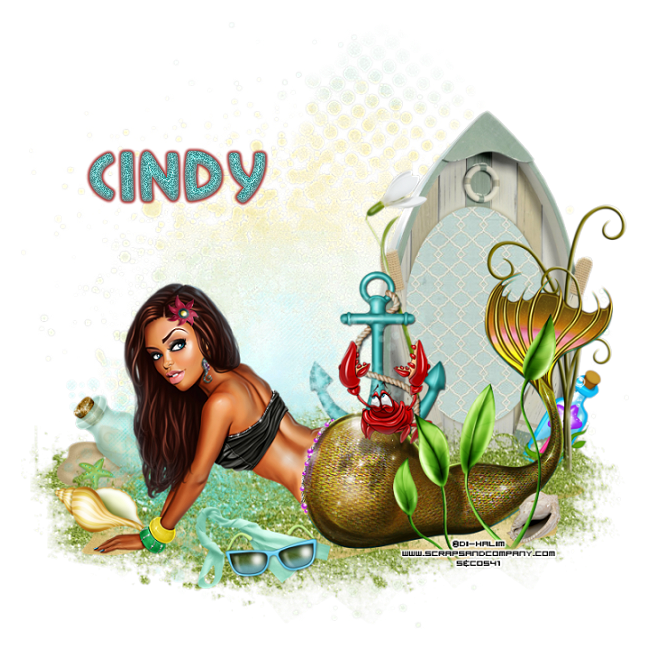
The little mermaid
Tutorial written on July 31st, 2014
supplies needed :
paint shop pro and a good knowledge of the program
tube of choice i used this cute mermaid tube by Di-Halim you can find his tubes
at ScrapsandCompany
sparkle mask 5 (just right click and save the mask, not sure where to find
this on the net i cant find it , if you know please email me and let me know so i
can give credit.)
tube of choice i used this cute mermaid tube by Di-Halim you can find his tubes
at ScrapsandCompany
sparkle mask 5 (just right click and save the mask, not sure where to find
this on the net i cant find it , if you know please email me and let me know so i
can give credit.)

Island adventure kit by scrapping with lil ole me you can purchase this cute
kit HERE
for the name i used treasure island font http://www.dafont.com/search.php?q=treasure+island
(for the font I used dsb flux bright noise and added a gg this is optional
so did not write out steps.
OK lets get started, This is a very easy tut
more copy and paste so did not point out every little detail like i normaly
do in a tut lol sorry, I just see more tuts are being wrote this way and seems to be the
way people are going.
more copy and paste so did not point out every little detail like i normaly
do in a tut lol sorry, I just see more tuts are being wrote this way and seems to be the
way people are going.
Ok forreal this time lol
open a new 750x750 transparent image
flood fill with white, we can resize later.
______________________________________
copy paper 7 as a new layer and apply the sparkle mask 5
___________________________________
copy and paste element 91 as a new layer
resize by 90% and move towards the bottom a little.
duplicate move down a little.
add this element again and resize by 80%
move to the left a little, mirror and move to the right
basically make a cluster out of this element.
just whatever looks good to you.
__________________________________
next paste element 105 (the boat) as a new layer
resize by 70%
move to the right and move this layer under one of your grass layers,but
on top of the others.
view current only, click inside the boat frame with your magic wand
selections/expand by 2, paste paper 14 as a new layer. Selections/invert
and hit delete on your keyboard. move this layer under your boat.
________________________________________
paste element 71 as a new layer resize by 80% mirror, and move under your
green glitter layers. see my tag for placement
_______________________________________
green glitter layers. see my tag for placement
_______________________________________
add your tube as a new layer, i had to resize mine by 50% and then again by 90%
add element 71 (the anchor) resize by 40% place over the boat and add drop shadow.
element 67 resize by 30% mirror and place to the left of the tag.
element 48 resize by 20% place over by the boat.
element 70 (the glasses) resize by 20% place in front of tube.
element 23 resize by 20%
element 78 resize by 50% place on boat and behind anchor.
element 11 resize by 50%
element 82 resize by 50%
element 85 resize by 50% place behind tube
element 104 and 73 resize by 20%
after adding all your elements add your copyright info and name to your tag
resize and save. Hope you enjoyed the tutorial would love to see your results. :)
Subscribe to:
Post Comments
(Atom)
0 comments:
Post a Comment