Grab My Blinkie

I CT For


Sunday, August 10, 2014
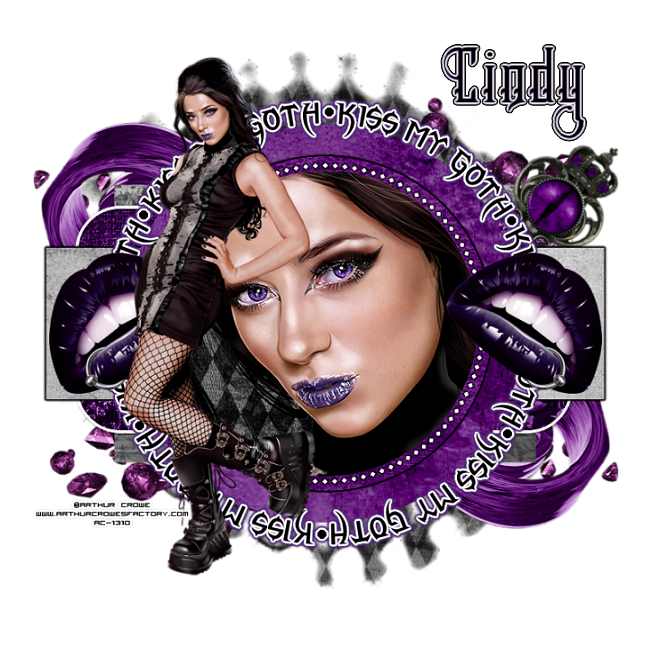
Kiss My Goth
tutorial written on 8/10/14
tutorial written on 8/10/14
by LadyQueen
paint shop pro/good knowledge of the program
TTzGothicKissesTemp2 its part of the gothic kisses blog train here
Awesome Color me goth scrapkit by Scrappin with lil ole me you can purchase the kit HERE
tube of choice, You can purchase this tube im using by Arthur Crowe here
SisMask 32 HERE
font of choice/ One used in tag is Royalty savior
____________________________________________
K lets get started.
Open your temp in psp
Shift D to duplicate/close out original
delete copy right info
start from the top and delete all the layers down to layer 8 encluding layer 8
and skip down and delete layer 6
resize your canvas 800X800 we can resize the tag later.
____________________________________________
Shift D to duplicate/close out original
delete copy right info
start from the top and delete all the layers down to layer 8 encluding layer 8
and skip down and delete layer 6
resize your canvas 800X800 we can resize the tag later.
____________________________________________
start with layer 7 add paper 9 delete original after each paper you add
layer 4 paper 31 move to the right just a little or leave it where it is
layer 5 paper 35
layer 3 paper 22
layer 2 paper 32
select layer 2 again float/defloat Selections/modify/contract by 18
paste paper 17 as a new layer, copy close up of your tube resize by 70%
move over to the right a little. Selections/invert hit delete on your keyboard
on the tube layer and the paper layer. select none.
_________________________________________________________
raster 9 (the word art) add a gradient glow this color #532e7d
layer 11 the dots add black graditient glow
add paper 17 send to the bottom resize by 90% twice
apply the mask. i moved the mask down just a little.
layer 11 the dots add black graditient glow
add paper 17 send to the bottom resize by 90% twice
apply the mask. i moved the mask down just a little.
_________________________________________
paste the lips(element 54) as a new layer
resize by 50% and then again by 80% place to the right
image/mirror
____________________________
copy your whole tube as a new layer place to the left of the tag
apply element 43 as a new layer image/rotate/right 90 degrees
bring to the bottom of your tag over the mask layer
image/duplicate, image/flip and Image/mirror.
element 8 resize by 70% use your deform tool to move it to the right
and place under all the layers (see my tag)
element 45 place above mask layer, Duplicate/flip and mirror
add copyright info and license number to your tag
for the gradient on my font this is how the settings should look
purple is this #532e7d
for the gradient on my font this is how the settings should look
purple is this #532e7d
thats it your all done, you can resize your tag. would love to see your results
hope you enjoyed :)
hope you enjoyed :)
Subscribe to:
Post Comments
(Atom)
0 comments:
Post a Comment