Grab My Blinkie

I CT For


Saturday, August 30, 2014
New Ct tut for Scrapping with lil ole me
Hot Cocoa
tutorial written on 8/30/14
tutorial written on 8/30/14

Supplies needed :psp 9 or any version
Harvestnights Scrapkit by Scrapping with lil ole me
you can purchase the kit here http://tinyturtledesigns.com/store/
DD_fallMask_6 you can get it HERE on Dees blog
Template 660 by Millie you can get this on her blog here
hot chocolate tube by Trinita You can purchase at picsfordesign.com
or any tube of your choice.
font of choice I used Akhenaton you can download it at dafont.com
word art of choice, I got the word art as a freebie
at www.DigitalDesignEssentials.com but I can not find it for anything now.
so maybe you can get another word art or make your own :)
_________________________________________________
Ok lets get started.
open up your template by millie, delete the copyright
shift D and close out the original.
change the canvas size to 750X750
fill the bg with white if you want to we can delete it later. i just
like doing it to see that nothing is going off the edge of the tag.
______________________________________________
on layer 1 paste paper 23 as a new layer
delete original.
you can leave raster 2 its just the dotted rectangle.
delete layer 3.
on layer 4 Selections/select all/float/defloat paste paper 14
as a new layer. do not deselect , open element 35 ,image/rotate
to 90degrees. copy on your tag.
Selection/ invert and hit delete on the paper and element layer.
Select none.
duplicate your paper layer and mirror. delete original laylers 4 and 5.
duplicate your element and mirror and move this over your paper layer on
the right.
______________________________________
layer 6 and 7 paste paper 21 as a new layer, place where you want it.
delete original layers.
add a light drop shadow on the left, horizontal and vertical 2, opacity 75
blur 4 color black. and on the right change vertical and horizontal to -2
____________________________________________
copy and paste element 47 as a new layer, resize by 50%
rotate to the left by 90 degrees place over the thin rectangle layer.
use your selection tool to crop off the pieces hanging over the thin
rectangle.
duplicate and mirror and place on the right of your tag.
add a drop shadow to these. only change vertical and horizontal to
1 on the element on the right and change it to -1 on the left
_______________________________
add element 37 over these layers, resize by 30% and then again by 80 %
rotate to the right, and place over your thin rectangles.
you can crop off any parts hanging over
see my tag for placement.
________________________
copy and paste element 61 resize by 70% and then again by 90%
place inbetween your left and right squares.
use your selection tool to draw around the frame paste paper 7
as a new layer. selections/invert hit delete on the keyboard.
add element 74 resize by 50% image/rotate to the left by 90 degrees
place over the left of the frame.
_______________________________________
paste element 24 as a new layer resize by 40 % , adjust sharpen
place to the right of the tag.
paste element 81 resize by 30%. place over the lantern.
___________________________________
paste your tube as a new layer i had to resize mine by 50% and then again
by 80%. move to the left just a little so shes not blocking the light lol.
__________________________________
paste element 30 as a new layer resize by 70% move under the tube layer
so that it looks like shes sitting on it. add a drop shadow h and v = 1
and then change it to -1.
______________________________________
element 29 resize by 50% move to the left , then duplicate/mirror
place under the small square layers. on each side.
element 84 resize by 30% move to the left , duplicate and mirror.
above the small square layers under the big yellow leaf.
________________________
element 65 resize by 50 % image/flip move down to the bottom
over to the right, duplicate ,rotate to the left by 90degrees
mirror place beside each other they go to the bottom of the tag.
element 25 resize by 70% and place over the above elements.
i had to use the deform tool so that it wouldnt hang out of my canvas.
this is how your tag should look without your tube.

_________________________________________________
add element 12 as a new layer resize by 30% place to the right of your tag.
add your word art as a new layer I added a gradient glow thats optional if you
like that effect. or just a place drop shadow would work as well.
_____________________
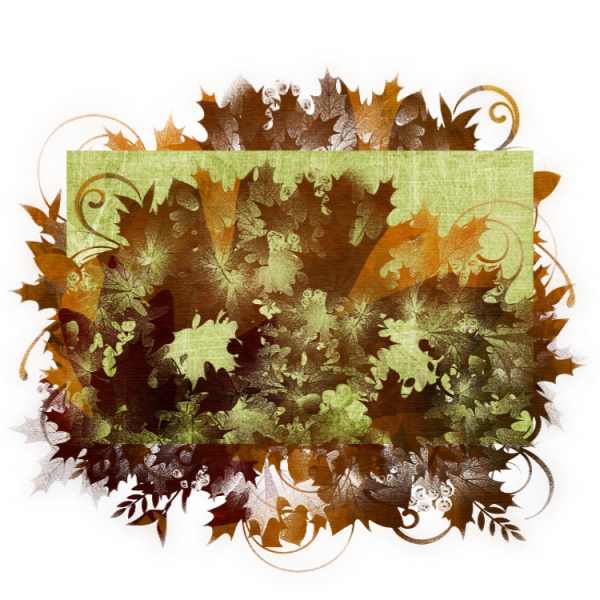
we are going to add the mask twice now, so only view the bg
layer and the big square layer, copy paper 15 as a new layer resize by 80%
apply your mask. image/mirror move to the bottom of your tag.
duplicate and move closer to the top, this is what you should have.
add your word art as a new layer I added a gradient glow thats optional if you
like that effect. or just a place drop shadow would work as well.
_____________________
we are going to add the mask twice now, so only view the bg
layer and the big square layer, copy paper 15 as a new layer resize by 80%
apply your mask. image/mirror move to the bottom of your tag.
duplicate and move closer to the top, this is what you should have.
_____________________________________
that is it, you can add any other elements or what have you to the tag
add your name and your copyright info.I usually merge all my layers
together and resize my tag to 650X650, save as usual.
add your name and your copyright info.I usually merge all my layers
together and resize my tag to 650X650, save as usual.
I hope you enjoyed this tutorial would love to see some results :)
Subscribe to:
Post Comments
(Atom)
0 comments:
Post a Comment