About Me
Hello, This is Reina
I go by the name LadyQueen
psp is my hobby and passion, I love to create.
thanks for stopping by
CT Tags -Tuts and Snag Tags
This blog was originally for my tutorials..I have stopped writting tutorials for a while, but my old tuts are still here.. This is where i will share allmy CT tags and Snags that you are welcomed to save to yourcomputer and use them in your groups.Please do not rip apart and please do not claim as your own. Thank you
Wednesday, September 17, 2014
11:04 AM | Edit Post
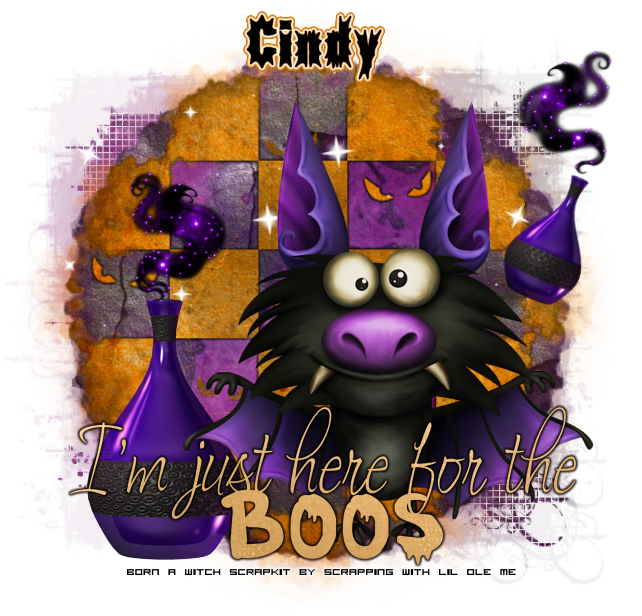
Here for the Boos
written 9/17/14
this is a very simple but Cute tut :)
written 9/17/14
this is a very simple but Cute tut :)
using only the kit unless you just want to add your tube.
Supplies needed:
psp 9
Born a witch scrapkit by Scrapping with lil ole me you can purchase this cute halloween
psp 9
Born a witch scrapkit by Scrapping with lil ole me you can purchase this cute halloween
kit here
Vix Mask 404, Vix_maskhalloween2012-10 and vix_maskhalloween2012-5
Vix Mask 404, Vix_maskhalloween2012-10 and vix_maskhalloween2012-5
Open a new image 650x650
flood fill with white you can delete it later I always do.
paste paper 18 as a new layer resize by 80% apply vix_mask404
paste paper 12 as a new layer resize by 80 % apply vix_maskhalloween2012
-5Nothallow.
apply a thick black gradient glow to this mask.
paste paper 5 as a new layer apply the same mask again.
paste paper 4 as a new layer apply Vix_maskhalloween2012-10
add the same dark gradient glow to this layer.
add element 32 (the stars)
______________________________________
copy element 126 as a new layer resize by 50% and move to the left
duplicate and resize by 50% again move to the right of the tag and use
your deform tool to tilt it to the right. (see my tag)
copy element 143 as a new layer resize by 30% place over bottle.
duplicate and mirror and place over smaller bottle.
________________________________________
paste element 103 as a new layer place it where you want him on the tag.
element 123 resize by 50% i took off the skull face on the word art.
selections/select all/float/defloat and paste paper 9 as a new layer
selections/invert hit delete on the keyboard.
now you can add what ever other elements you would like to your tag
add your name..I used Aftermath BRk and added noise then added a
gradient glow.
add your name..I used Aftermath BRk and added noise then added a
gradient glow.
for cr info i just used the name of the kit and designer when not using a tube from an artist.
see that was easy..I hope you enjoyed this tut would love to see your results.
Subscribe to:
Post Comments
(Atom)
Categories
- **CT Bella Caribena**
- Animated PTU tutorial
- Animation settings tutorial
- CT KZ Designz
- CT Kiya Designs
- CT Kloe and Elegancefly
- CT Savage Dezines
- CT for Katharine Art
- CT tutorials
- Ct Elegancefly and Savage Dezines
- Elegancefly
- PTU animated tutorials
- PTU kits
- PTU non animated
- Savage Dezines CT
- Snag tags
- Snags
- animated tutorials
- ptu tube free kit


0 comments:
Post a Comment