Grab My Blinkie

I CT For


Wednesday, September 10, 2014
CT For Scrapping with lil Ole me
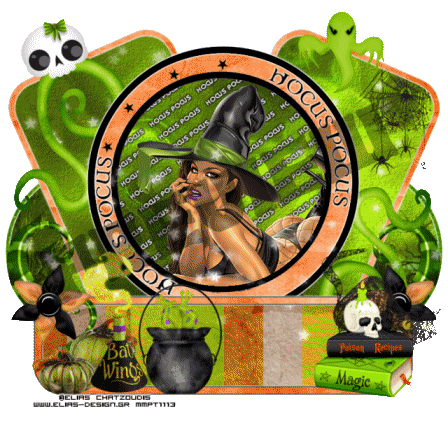
New PTU tut animated : Hocus Pocus
Written on Sept 10th, 2014

paint shop pro 9 or any version
animation shop 3
1 or 2 tubes of your choice I'm using the artwork of Elias Chatzoudis
you can purchase his tubes here Using a few older tubes but they are timeless i think :)
Sorcerers_spells scrapkit by Scrappin with lil ole me
you can purchase her scrapkits here
template 79 by Punky Butts HERE
animation by Missy:
Aura_ByMissy you can find this awesome animation here on her blog
its the one that says 5 new animations.
eye candy gradient glowfont of choice I used Wizards Magic
_______________________
OK lets get started
Open up the template delete the cr layer
and the top stars layers 18 and 19.
____________________________
layer 17 add paper 20 resize by 70%
delete original.
layer 16 add paper 25 resize by 70%
delete original layer.
layer 15 select all/float/defloat add a new layer and flood fill with
black. select none and delete original layer.
layer 14 (The word art) selections/select all/float/defloat add a new
layer and flood fill with black, add a white gradient glow to this.
duplicate, image/flip, image mirror place on the other side of the big
circle to where it lines up.
layers 10 and 13 select all/float/defloat add new layer and fill with
black again. select none and delete original.
layers 8, 6 and 9 paper 20
layers 11, 7,5,4 and 2 paper just place on different parts of the paper for
each section to your liking.
layers 3 and 1 paper 16.
add white gradient glow to the edges off all your layers. ( I like doing this for
when im going to animate a tag)
_________________________________________
when im going to animate a tag)
_________________________________________
layer 12 (the wa in the circle) add a black gradient glow to this.
go ahead and add your first tube as a new layer to your tag.
_____________________________________
ok now we can add elements (i'm using alot of elements so
just going to put what the sizes are you can see my tag for placement
and also add your own elements from there kit there are alot to choice from.)
_____________________________________
element 52 (spider web) resize by 30% place over to the right
duplicate and take out the part hanging over the edges.
element 46 resize by 30%
element 10 resize by 50% and then again by 70%.
element 50 resize by 50% place like the skull is biting down on it.
duplicate , flip and mirror and place to the bottom right.
element 134 resize by 70% , rotate to the right, flip and use your
deform tool place under long rectangle at the bottom.
duplicate and mirror.
element 106(the stars) place under the big circle taking out the parts hanging
over the left and right rectangles at the top. duplicate and place over the circle.
element 124 resize by 30% place to the right of the tag duplicate and mirror.
element 32 resize by 30% place to the right of tag.
element 114 (the cat) resize by 50% place under element 32 and above the
flower. on the right.
element 67 (the bat wing potion) resize by 30%
element 5 (the little smoke) resize by 30% mirror place over potion.
element 116 (the glass pumpkins) resize by 30% place behind the potion.
element 58 (the pot with frog feet hanging out) resize by 30%
______________________________________________
ok now we are going to set up our animation, x out everything except
the small inner black circle click inside with your magic wand, paste
element 7 (the frog) or any other element as a new layer. if your using
the same tube as me or any tube really just place where you like it
in the middle, kinda line it up with the frog, selections/invert and hit
delete on both the frog and the tube layer, just to get whats hanging over the
edges. place both under the circle layer.
open back up all the layers except the frog leave him out for a min.
_______________________________________
at this time you can go ahead and add your copyright info and name if
you wish, I went ahead and resized all layers to 80% just make
sure you sharpen your tube layers and any other layers you think look blurry.
_________________________________________
OK now X out the background layer , the top tube layer and the frog
copy/merged on the top of the tag, take over to animation shop
paste as a new animation.
go back to psp and change the opacity of the tube inside the circle to
90% , go back to animation shop, right click on the tag and paste after
current frame.
back to psp change opacity of the tube to 95% back to animation shop
right click on the second frame and paste after current animation
keep doing this , changing the tube opacity to
80%
85%
75%
70%
65%
60%
55%
50%
40%
and 45%
now when you have 12 frames with the middle tube
view your animation you should have something like this.
___________________________________________
Edit/Select all
open up your animation (aura by missy) Edit/select all
Edit/propagate paste, Edit/copy
Edit/propagate paste, Edit/copy
go over to your tag, Edit/paste into selected frames. when the
animation comes up you only see a little dot or atleast thats all i see lol
line it up in the middle like right under her eye.
view the animation.
animation comes up you only see a little dot or atleast thats all i see lol
line it up in the middle like right under her eye.
view the animation.
go back to psp x out this tube and un X the frog layer
go back to animation shop and click on the very last frame of the tag
right click on only it! and paste after current frame.
right click on this frame with the frog change the frame properties
to 80%.
go to the very first frame and right click and change the frame properties
to 80% as well.
view your animation if your happy with it select all
go back to psp copy your tube, go back to animation shop paste
as a new animation, then copy this again go to your tag and paste into selected
frames. do not let go until you have your tube where you want it on the tag.
go back to psp copy your tube, go back to animation shop paste
as a new animation, then copy this again go to your tag and paste into selected
frames. do not let go until you have your tube where you want it on the tag.
if you waited like i did to add your name you would add your name in psp
and copy it and take it to animation shop and paste it like you did the tube.
and save.
and copy it and take it to animation shop and paste it like you did the tube.
and save.
I hope you enjoyed this tutorial. if you have any question or comments please
feel free to ask.
feel free to ask.
Subscribe to:
Post Comments
(Atom)
Dear Lady Queen ~ My Blog address has changed & ty for using my template
ReplyDeletein your tutorial xx
Here is my New Blog Link ~ Posting the direct template link
https://punkysproductions.blogspot.com/2010/09/template-79.html
Thank you! Punky xx